Showing posts with label Raven Detail Ink. Show all posts

Tuesday, January 4, 2022

Love You More with Brutus Monroe


Hello everyone!  Can you believe it's a new year already?  I don't 
know about you but I'm ready for new and better year!  So, to kick
off January 2022 my project will be using products from


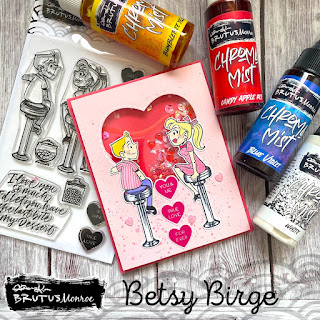
This Love You More Stamp Set is so cute!  I had to make a shaker
with it!  Let me show you how I made my card!
I first stamped my images with Raven Detail ink onto Whitewash card
stock.  I cut a light pink top panel to 4" x 5 1/4" and die cut a heart
shaker window.  This darker pink card stock in the photo will be my
card base.


I started my coloring with Chroma Mists.  I used Blue Violet, Bumblebee
Yellow, Candy Apple Red and White.I mixed the Red and White for my
pink areas and Yellow and White for their hair.  
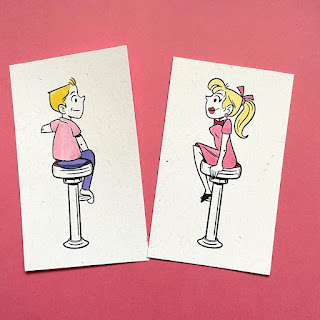

For the skin tones I used Copics E51 and for the stools I used
C0, C3, C7 and 100.  I added a little R20 for their cheeks.


With a glitter gel pen I added stripes to the boy's shirt and polka dots
to the girl's dress.  I also added a bit of white gel pen around the
pupils of their eyes.  Once these were dry I fussy cut them. I also took
a smaller piece of the dark pink card stock to go behind the shaker
bits and sprayed it with an iridescent spray and then adhered it
into place.


 Now it was time for the base of the card.  Placing the evacuated heart back into
it's space to protect the piece of acetate I had adhered there, I splattered Chroma 
Mists that I had mixed - the Red and White - to make a matching pink.


Once that was dry I took out the evacuated piece and flipped over the
main panel to add foam tape.  I used 2 layers of the Brutus Monroe Foam
Tape.  I was going to use some rather chunky shaker bits and I wanted
them to shake freely.  I put a pile of shaker bits onto the base and then
gently placed my top over it.


For a sentiment I used 3 of the candy heart stamps in the set.  For
ink I used Simon Hurley's Prom Queen.  I stamped them on the light
pink card stock and then fussy cut them.


To finish I adhered my couple onto the card using liquid glue and
leaving enough room in-between so one of the candy hearts would
fit into the space, then I adhered the candy hearts vertically.  Finally I
adhered 3 puffy hearts (same ones used as shaker bits) around the
bottom of the card.


I hope you enjoyed the project today.  I had so much fun designing
and making this card!  You can find the products I used at


Thank you so much for stopping by today!

Betsy

In my capacity as a design team member for Brutus Monroe, I do receive the products I use from them.

 All opinions and creative decisions remain my own, and I only work with companies/use products that I love.




Wednesday, May 5, 2021

Reach For The Stars with Brutus Monroe


Hello everyone!  The May Inspiration Box is here from


This Inspiration is jammed packed full of spacey goodness and fun!
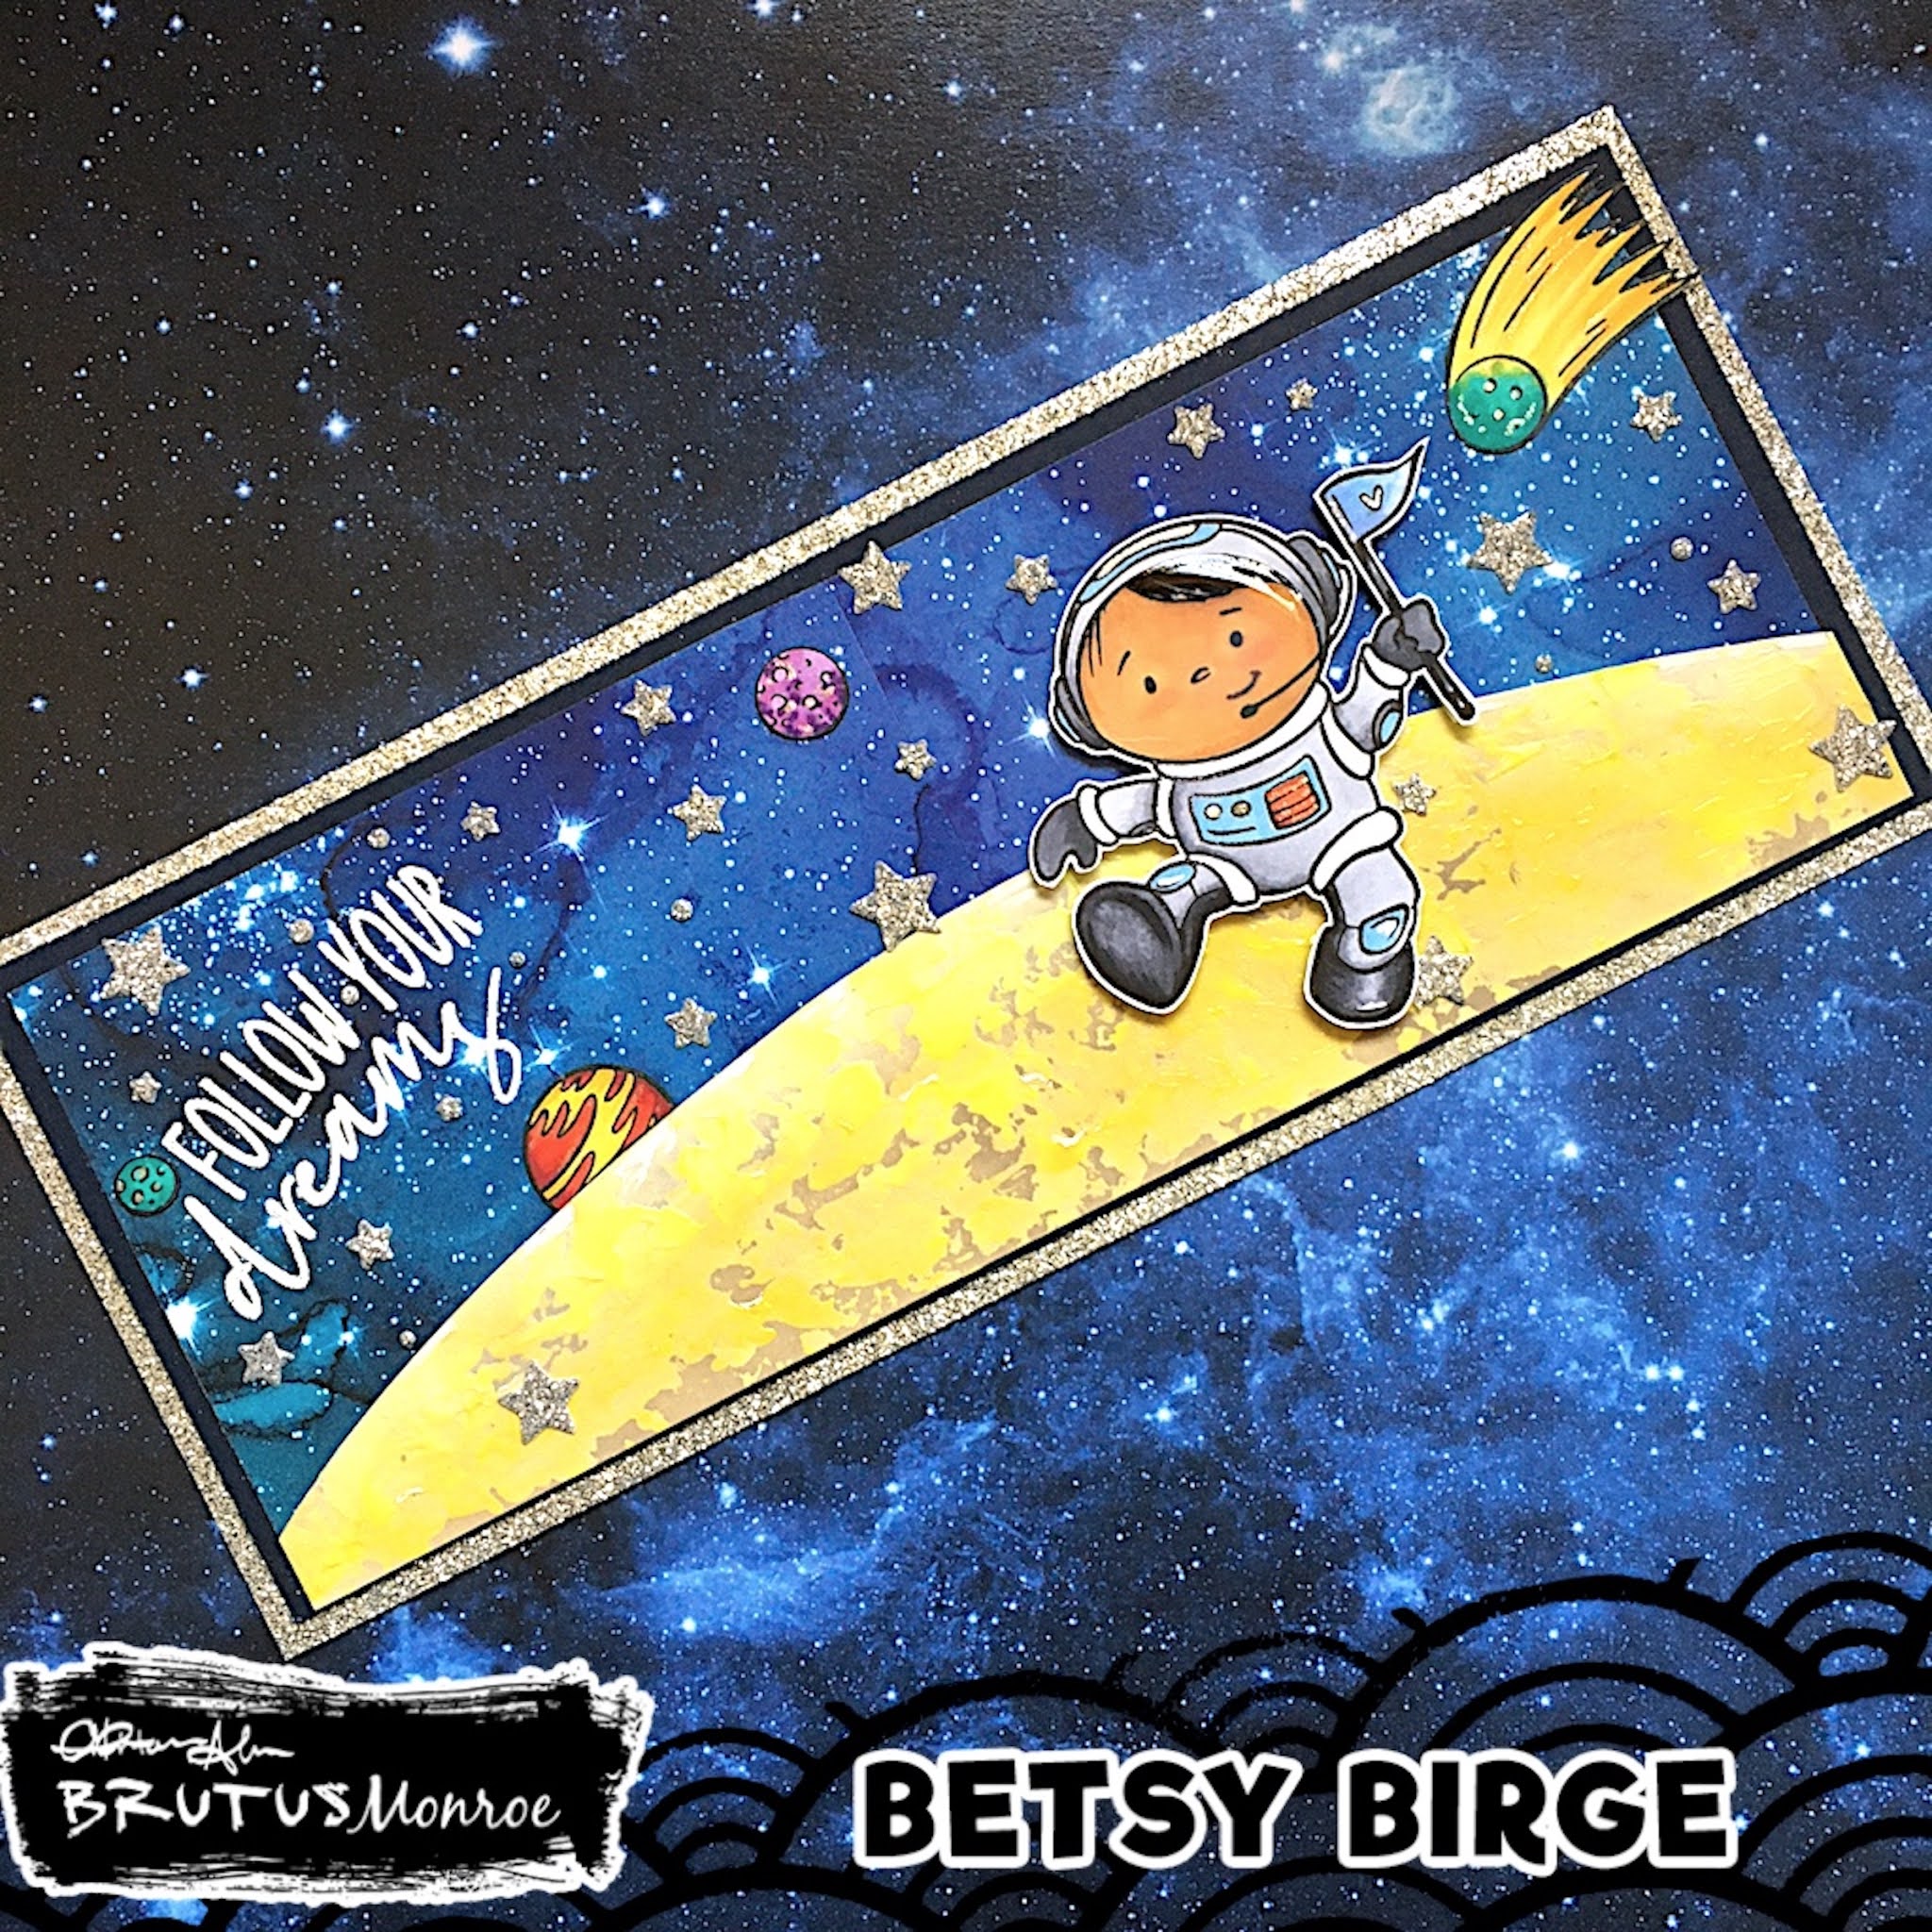
Let me show you how I made my slimline card!
The first thing I did was to chose and prepare my background paper.
I chose the Watercolor Galaxy Paper Collection.  However, it is only
6" x 6".  So I cut it directly down the center and used a piece of
1/2" Brutus Monroe Tissue Tape to keep the ends butted together.
I didn't remove the release paper at this time.  I trimmed the ends so
my finished panel measured 3" x 8".


Next I needed to make the base for my little astronaut to stand on.  I
chose a piece of dull yellow card stock and on one end of it, drew an
arc and cut it out.  


I wanted to use both the Daffodil Chroma Glaze and the Neon Yellow
Chroma Glaze for texture.  So, taking the tip of a palette knife, I
applied the Daffodil first.  I applied it sort of thick - thick enough so
my knife skipped over the surface of the card stock.  Then to give
it more texture I tapped my finger into the wet glaze.


Without waiting for the Daffodil Glaze to dry I applied the Neon Yellow
Glaze in the same manner applying more at the top of the arc.


I set this aside to dry.  I next stamped my sentiment onto the upper
right corner of my patterned paper curving the stamp a bit and heat embossed it with
Alabaster Embossing Powder.  I backed the patterned paper panel with
a very dark blue card stock and adhered it onto my  3 1/2" x 8 1/2" card base that
was covered with silver glitter card stock.


Next I stamped my images with Raven Detail Ink.  I used 5 of the images -
 4 planets plus the little astronaut.


I originally planned on only 3 planets but added in the 4th one
later on in my process.  I colored my images with Copic markers.


Copic markers used:

Red:  R05, R17, R59, R20
Violet: V12, V05, V09
Blue:  BG15, B49, B32, B63
Yellow:  Y15, Y38
Grey:  C1, C3, C5
Brown:  E21, E3, E35
Blender & Black

After these images were colored I fussy cut them and used a black
water-based marker around the cut edges.  I did leave a very
narrow white outline around the little astronaut.
By this time, my glazed piece was dry.  To accentuate the
texture and give it depth, I first blended Simon Hurley
Woof ink with a blending brush and to the very top curve
of the arc I used Alabaster Pigment Ink to hi-lite.  Then I adhered
it to my card base.


Using a die from my stash I die cut various size stars from
the left over silver glitter card stock.  I adhered my little astronaut
with foam tape and glued the planets down flat.  Then I
adhered the stars.  Using a Gel Roll Stardust pen I accented the
planets and bits on the astronaut suit, helmet and flag.  I also
added touches with a white gel pen.  I used Glossy Accents on the face 
of my astronaut to make it more like a helmet and my card was done!


I had so much fun creating this card!  And I was really pleased with
how my moon base turned out!  Those Chroma Glazes are
Out of This World!!!!!!!!!  You can find the supplies I used for
my project today at:


The Inspiration Box is a subscription product.  Find it along with all
of the other subscription products here.

Thanks so much for stopping by.  I hope I've inspired you today to
create something you love!

Betsy

In my capacity as a design team member for Brutus Monroe, I do receive the products I use from them.

 All opinions and creative decisions remain my own, and I only work with companies/use products that I love.


Monday, March 8, 2021

Homegrown Happiness with Brutus Monroe


Hello everyone!  Today I get to share a project made with the


This is such an awesome stamp set in this month's box!  Lots of sentiments and
flowers!  For my project I decided to try out my new Gel Press!  I had
never used one before so it was very exciting to give it a try!
I put Creamy Aqua Pigments on my press in Light Green and Teal.  I
knew they would probably mix so I made sure the colors were analogous. 
After using my brayer on it, I placed the Sequin Builder Stencil on top
of it and used a panel of light weight white card stock.  After it dried, I splattered
it with the Light Green Cream Aqua Pigment.


I was really pleased with how this came out.  I had to flatten it and make sure
t was completely dry before using it, so I set it underneath my computer...it's very
warm under there!  Then I cut and adhered my panel to a mini slimline card.

I stamped out the jar image onto vellum, colored it on the back with a BG01
Copic marker and cut it out right up to the black line.


Next I stamped my flowers, leaves and stems onto to some hot press
watercolor paper with Raven Detail Ink.  I used Strathmore and I get packs of 25
 5" x 7" on Amazon.


I used a mix of Creamy Aqua Pigments in Orange, Teal, and Light Green.
I used regular Aqua Pigments in Amber, Sunflower, Lime and Yellow Orange.
Some of these were metallic.  I mixed all these colors and types throughout
my painting process.


When these were dry I fussy cut them and then ran a water based black
marker around the edges.  The stems are quite thin and the watercolor paper
is quite thick, so when I cut them out they were a bit curved.  I decided I
would tuck them into the jar.  I made a slit along the front edge of the jar
and slipped the stems in where I wanted them and adhered them with 
just a drop of liquid glue.


I also took a scrap of the watercolor paper and used the Aqua Pigments on
it and let it dry. 


Then using the Raven Detail Ink I stamped my sentiment on it.


After the ink dried completely I fussy cut the sentiment out.

I adhered the jar to my card base running a narrow bead of liquid glue around
the jar black outline.  Because the stems were not flat this caused the jar
to be a bit puffy in the middle...it was perfect!  Next I adhered my flowers to the card popping
up only the top one on foam tape and then tucking in the leaves.  I added some
white gel highlights on the jar and the flower centers.
For a little shimmer, I added some sequins and a bit of shimmer pen to
the centers of the flowers and the jar.  I adhered my sentiment flat in the
lower right corner and my card was done!


I hope you were inspired by today's tutorial.  I am really looking forward to
experimenting more with my Gel Press!  You can find the Gel Press
and many other great products at


The Homegrown Happiness Inspiration Box can be bought through a
subscription.  A new box comes to your door every month!  Never miss
out on an Inspiration Box again!

Thanks so much for stopping by today!

Betsy

In my capacity as a design team member for Brutus Monroe, I do receive the products I use from them. 

All opinions and creative decisions remain my own, and I only work with companies/use products that I love.


Monday, January 18, 2021

Stamp & Stencil of the Month with Brutus Monroe


Hello everyone!  Today I'm sharing all kinds of crafty goodness from:


Both the Stamp and Stencil of the Month are adorable this month and all
are love-themed!  Let me show you how I made my cute shaker card!

I first taped a piece of hot press watercolor paper to a hardboard.  I used
Cosmo Hydrowash, just gently moving down the paper with a back and
forth brush stroke until I achieved the smooth look I was going for.


You can see it buckled my paper.  I let it dry completely before moving onto
the next step.  When it's dry, the paper is completely flat.  With the panel still
taped in place, I used Pixie Spray to adhere my Stencil down and used the
Glitter Glaze of the Month - Poppy! And then let it dry completely before moving on.


Once this was completely dry I removed it from the board and trimmed it to
3 5/8" x 5".  Next I stamped my image using Raven Detail Ink and my MISTI.


I colored the image with Copic markers.  For colors I used:
W0, W1, W3, W5, RV10, RV02. RV06, YR02, R02
When my coloring was complete I fussy cut the image out.


Using a heart die from my stash I die cut a heart from the stenciled panel.
I placed it in the center a bit closer to the top.  My particular die cuts a frame
as well as the main heart image.


I prepared an A2 size top folding white card base and adhered a cut panel
of white glitter paper to fit behind the heart shape.  Using the top stenciled
panel as a guide, I adhered my frame inside onto the white glitter paper.


I gathered the components for my shaker card.  Then I die cut the "Hugs" from
Christopher's Sentiments Cutting Die Set.  I used the white glitter paper for the
letters and black card stock for the backing and adhered them together.  I adhered
a piece of acetate behind the heart opening on the main panel and then placed
foam tape on the back, making sure I surrounded the heart with continuous tape.
Onto the base of the card within the framed heart I added my Mermaid Sequins -
Pink & Red, then I placed the top panel over it to secure the shaker.


I added my little bunny and then the Hugs die cut over it and colored in the very
centers of the little flowers with an orange glitter pen. I adhered the left over
evacuated heart die cut to the inside of the card. 
And my card was complete!


This card was so much fun to make!  With so many great products, cards come
out special every time!  If you haven't shopped 


lately - go now!  Lots of new products in stock and always something on sale!

As always I appreciate your time and interest!

Betsy


In my capacity as a design team member for Brutus Monroe, I do receive the products I use from them.

 All opinions and creative decisions remain my own, and I only work with companies/use products that I love.


Tuesday, December 15, 2020

Gift Tag with Brutus Monroe


Hello everyone!  Today we'll be making a gift tag with products from:


Pack!  I first die cut my tag using the Winter Cabin Paper and then a
size smaller tag using Neenah 80lb Classic Crest Solar White card stock.


I nest stamp my main image onto the white tag using Raven Detail Ink.


I also used a scrap of the same card stock and stamped out my
accessories for the snowman!


I colored my snowman & accessories using Copic Markers.


Copic Markers used:

Red:  R05, R17, R59
Orange:  YR04, YR07
Brown:  E33, E37, E47
Black: 100
Snow & Snowman:  B0000

After coloring I fussy cut the accessories right up to the outline
and then went around them with a black marker.


I adhered the white tag which I backed with black card stock to the plaid tag and 
the accessories onto my snowman.  Then I added GlossyAccents to the sunglasses, 
and the coal bits.  After that was dry I applied Stickles Glitter Gel in Moon Dust over 
the snow on the ground and the snowman.  I added just a touch of white gel pen to
 the sunglasses for reflection, then I took a Sakura Star Dust Gel Pen and dotted 
the insides of the snowflakes in the background.    When I was dry I punched a hole in
 the top and added twine.  And that finished my tag!


I hope you enjoyed today's tag project.  This would also look cute mounted 
onto a card front!
To find these supplies and lots of other supplies and inspiration visit:


They have the most incredible sales ever!!!!!  It's worth a visit!

Thanks so much for stopping by today!  I appreciate your interest!

Betsy

In my capacity as a design team member for Brutus Monroe, I do receive the products I use from them. 

All opinions and creative decisions remain my own, and I only work with companies/use products that I love.


Thursday, November 5, 2020

Comfort & Joy with Brutus Monroe


Hello everyone!  Today I'm sharing with you the stamp set from the newest
Inspiration Box from

Brutus Monroe
Comfort & Joy

This stamp set is so cute and retro!  This took me back to the '60's!!!  The
tv is so spot on it just cracks me up!  Let me show you how I created this
slimline card.
I knew I would be stamping out almost all of the images in the set.  I took
this as an opportunity to use up scraps of my Neenah 80lb Classic Crest Solar
White card stock.  I stamped everything on it's own scrap of paper with
Raven Detail Ink.


Originally I was going to use the "Home" stamp but ended up not needing it.  I wanted
to make a cohesive scene so I picked out my papers first.  I was really going to a retro
living room vibe.  So I chose a small patterned paper for the wallpaper and a wood look
paper for the floor.  This allowed me to then color match my Copic markers.


I started with the biggest item first.


I did the drapes next.


The windows were quite plain but I added pale blue for the frosty panes of glass!


Copic colors used:

Window:  B60, B00, B0000   Molding/Sils:  W0, W1
Curtains:  YR61, YR02, R14
Curtain Rods:  E31, E33, E35
Chair:  YG11, G82, G94, G99
Chair Feet:  E31, E33, E35, E37
Chair Doily:  C0, C1
Cat:  Y21, Y28
TV:  E31, E33, E35, 1000, C1, C5
Dog:  C1
Welcome Sign:  E31, E33, E35
Rug:  Combination of colors used

Next I prepared my card base.  I made a slimline base from Neenah 100lb
Desert Storm card stock.  My card when folded measures 3 1/2" x 8 1/2".
I adhered my patterned paper and wood paper together and attached it to my base.
I used a scrap of white card stock for the baseboard.


I fussy cut all of my images out and adhered them flat to the card.  I added shimmer
pen to the window frames so they would look all frosty.  I added Glossy Accents to the
screen of the tv to look like glass and then added white highlights with a gel pen.
And that finished my project!


I hope you liked today's tutorial.  It was fun making it!  We would love
to see your creations on the Brutus Monroe Fan Page on Facebook!
Tag us with your makes!!!

Thanks so much for stopping by!  I appreciate it!

Betsy


A Pirate's Life! ft. Kate Hadfield Designs

  Hello everyone!  Today I'm sharing this adorable pirate-themed wiper card.  A fun card to put together!     I'll be using products...