Showing posts with label shaker card. Show all posts

Friday, September 29, 2023

Autumn Afternoon w/Kate Hadfield Designs


Hello everyone!  Autumn is truly upon us and I am so ready to create fall
cards!  Today I'll be showing you a shaker card made with


This set is full of fall images to create scenes with.  I didn't have a shaker
card in mind when I started, but it just was screaming to be shaken!  ðŸ˜‚
Let me show you how I made my card.


I started out by composing my images in the computer and printing them out onto
white card stock.  I also printed out a sentiment.  At this point I chose my background
paper so I would have a color palette to work with.  This paper is from Scrapbook.com.


Using a scrap piece of card stock I tested my colors and held them up against the
background paper to make sure they worked well together.


As I colored my image I continually held it up against the background paper just
to see how it was going to look.


Copic colors used:
BG0000, BG70, BG72, BG75, R02, R05, R17, R35,
W1, W3, W5, Y15, Y17, YG91, YG95,
YR14, YR15, YR16, YR18,
E08, E15, E18, E19, E23, E30, E33,
E34, E35, E37, E47


Next I made an A2 size top folding card base from Lunch Bag card stock from
Brutus Monroe.  I die cut a circle in the middle of my background panel that was
big enough to encompass the design.  I adhered a piece of acetate behind the circle,
then added foam tape around the circle and the rest of the panel.  I had lightly
drawn a circle on my colored image so I would know where to adhere it to the
card base.  I added leaf shape sequins (from Amazon) to the middle of the
colored image and then placed the die cut background over it.  


Using a banner die, I die cut the sentiment and used one of the lighter 
Copic colors so it wouldn't be stark white.  I adhered this flat to the front of 
the card and I was finished!


You can purchase these digital stamps and more at


Thanks so much for stopping by!

Betsy

In my capacity as a design team member for Kate Hadfield Designs, I do receive the products I use from them. 

All opinions and creative decisions remain my own, and I only work with companies/use products that I love.


Tuesday, June 14, 2022

Be Happy Cutting Dies with Brutus Monroe


Hello everyone!  Today's project is super cute, happy and sparkly!  I'll be
using products from


This shaker easel card was fun to make and I came up with a technique to really
customize your product!  Let me show you how I made my card!
I first started by die cutting my rainbow and bird out of white card stock and placing
them on my Stick & Stamp Mat.


I didn't have the colors I was looking for to do this project, so I took Fallen Snow
Glitter Glaze and mixed a bit of Chroma Mists into it for each color.  The Chroma
Mist colors that I used were: Pink, Yellow Orange, Yellow Green, Blue Violet,
Lilac Purple and Turquoise.


I pulled these off my mat, cleaned my mat and then let these pieces dry.  I also
die cut 3 of the sparkles using Sterling Elegant Essentials.  Once everything was
dry I mounted my rainbow strips onto the base - there is a die for that.  I also put
my bird together and used a black marker for the eye and legs.


 I made a 4 1/4" x 4 1/4" white card base.  I
scored the front of the card in half to create my easel.  I made a panel of
what card stock for the upper half that was 4" x 2".  I inked blended in
a sky using Simon Hurley's breakup blue ink. 


For the bottom half of the card - the shaker part - I cut the same
2" x 4", but also allowed for the rainbow someplace to sit.  I then
die cut the two little clouds that would become the shaker.  I
ink blended on this panel as well.  Next I die cut the bottom of
the rainbow on both sides to accommodate the shaker holes.


I put foam tape on the back of the panel but not the top of the rainbow part.  I
filled the cloud part with rainbow confetti and some other bits.


Next I adhered my rainbow.  I put an acetate strip behind the bird and attached
him to the rainbow.  I adhered my twinkle pieces and added some small silver
twinkle bits for added sparkle.  I also die cut a few clouds and used them on the
top portion along with more twinkle bits.
For the inside I cut another 4" x 4" panel and ink blended it the same as the
front pieces.  I die cut 3 of the shadow layers of the sentiment out of white
card stock.  I die cut the letters out of coordinating card stock to make a rainbow
when glued together.  I added Fallen Snow Glitter Glaze on top of the letters
to make them sparkle.


And that finished my card!


And that finished my card!  I hope you enjoyed this sparkly shaker card!  So
fun to create with all of these dies!  Find this set and more at

Brutus Monroe

Thanks so much for spending time here today!

Betsy

In my capacity as a design team member for Brutus Monroe, I do receive the products I use from them. 

All opinions and creative decisions remain my own, and I only work with companies/use products that I love.


Tuesday, January 4, 2022

Love You More with Brutus Monroe


Hello everyone!  Can you believe it's a new year already?  I don't 
know about you but I'm ready for new and better year!  So, to kick
off January 2022 my project will be using products from


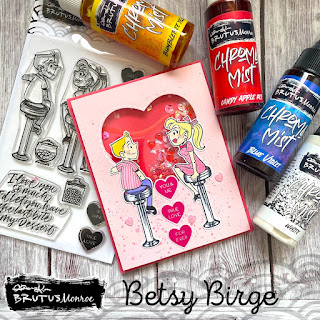
This Love You More Stamp Set is so cute!  I had to make a shaker
with it!  Let me show you how I made my card!
I first stamped my images with Raven Detail ink onto Whitewash card
stock.  I cut a light pink top panel to 4" x 5 1/4" and die cut a heart
shaker window.  This darker pink card stock in the photo will be my
card base.


I started my coloring with Chroma Mists.  I used Blue Violet, Bumblebee
Yellow, Candy Apple Red and White.I mixed the Red and White for my
pink areas and Yellow and White for their hair.  


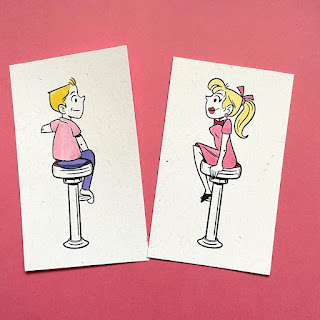
For the skin tones I used Copics E51 and for the stools I used
C0, C3, C7 and 100.  I added a little R20 for their cheeks.


With a glitter gel pen I added stripes to the boy's shirt and polka dots
to the girl's dress.  I also added a bit of white gel pen around the
pupils of their eyes.  Once these were dry I fussy cut them. I also took
a smaller piece of the dark pink card stock to go behind the shaker
bits and sprayed it with an iridescent spray and then adhered it
into place.


 Now it was time for the base of the card.  Placing the evacuated heart back into
it's space to protect the piece of acetate I had adhered there, I splattered Chroma 
Mists that I had mixed - the Red and White - to make a matching pink.


Once that was dry I took out the evacuated piece and flipped over the
main panel to add foam tape.  I used 2 layers of the Brutus Monroe Foam
Tape.  I was going to use some rather chunky shaker bits and I wanted
them to shake freely.  I put a pile of shaker bits onto the base and then
gently placed my top over it.


For a sentiment I used 3 of the candy heart stamps in the set.  For
ink I used Simon Hurley's Prom Queen.  I stamped them on the light
pink card stock and then fussy cut them.


To finish I adhered my couple onto the card using liquid glue and
leaving enough room in-between so one of the candy hearts would
fit into the space, then I adhered the candy hearts vertically.  Finally I
adhered 3 puffy hearts (same ones used as shaker bits) around the
bottom of the card.


I hope you enjoyed the project today.  I had so much fun designing
and making this card!  You can find the products I used at


Thank you so much for stopping by today!

Betsy

In my capacity as a design team member for Brutus Monroe, I do receive the products I use from them.

 All opinions and creative decisions remain my own, and I only work with companies/use products that I love.


Saturday, August 1, 2020

Handful of Tulips with Rachel Vass Designs


Hello everyone!  It's New Release Day at

Handful of Tulips


Today I decided to go with a shaker!  This design lends itself nicely
to a shaker because Rachel has included a design in a circle!
So first I printed out the design.


With what I printed out on this one sheet of Neenah 80b Classic Crest
Solar White card stock - I could get 4 cards total!  But I decided to use one
of the circle designs.  I chose my background paper first.  This was so
I had a direction to go in for color on my design.  I used Farmhouse Market
by Carta Bella and I used Copics to color my image.


Copic Colors used:

Leaves/Stems:  G20, G12, G24
Yellow Tulips:  Y000, Y00, Y02, Y21
Pink Tulips:  R000, R00, R11
Blue Tulip:  BG70, BG11, BG72, BV17, YR31, BG75

I next printed out and trimmed up my sentiment.  In looking at
both the sentiment and the flower circle against the background paper
I chose, I decided it needed just barest hint of color around the edges.
I used E0000.


Next I adhered the the flower piece onto my card base.  For that base I
used White Wash card stock from Brutus Monroe - it's a wonderful
alternative to white.  I cut my patterned paper to 4" x 5 1/4" and die cut
a hole slightly smaller than my flower circle.


I adhered a piece of acetate over the die cut space then placed foam tape all
over the back.  I doubled the foam tape so it was thick.  I placed my sequins on
my flat card base over the flowers in a little pile and then I placed my patterned
paper over it.  I adhered my sentiment down flat underneath the shaker and
added a few dots of Crystal Drops in Sunlit Meadow.  And that finished
my card!


I love how this card came out!  You can find this New Release
and many more lovely designs at


Thanks so much for stopping by!

Betsy

In my capacity as a design team member for Rachel Vass Designs, I do receive the products I use from them. 
All opinions and creative decisions remain my own, and I only work with companies/use products that I love.


A Pirate's Life! ft. Kate Hadfield Designs

  Hello everyone!  Today I'm sharing this adorable pirate-themed wiper card.  A fun card to put together!     I'll be using products...