Hello everyone! The May Inspiration Box is here from
This Inspiration is jammed packed full of spacey goodness and fun!
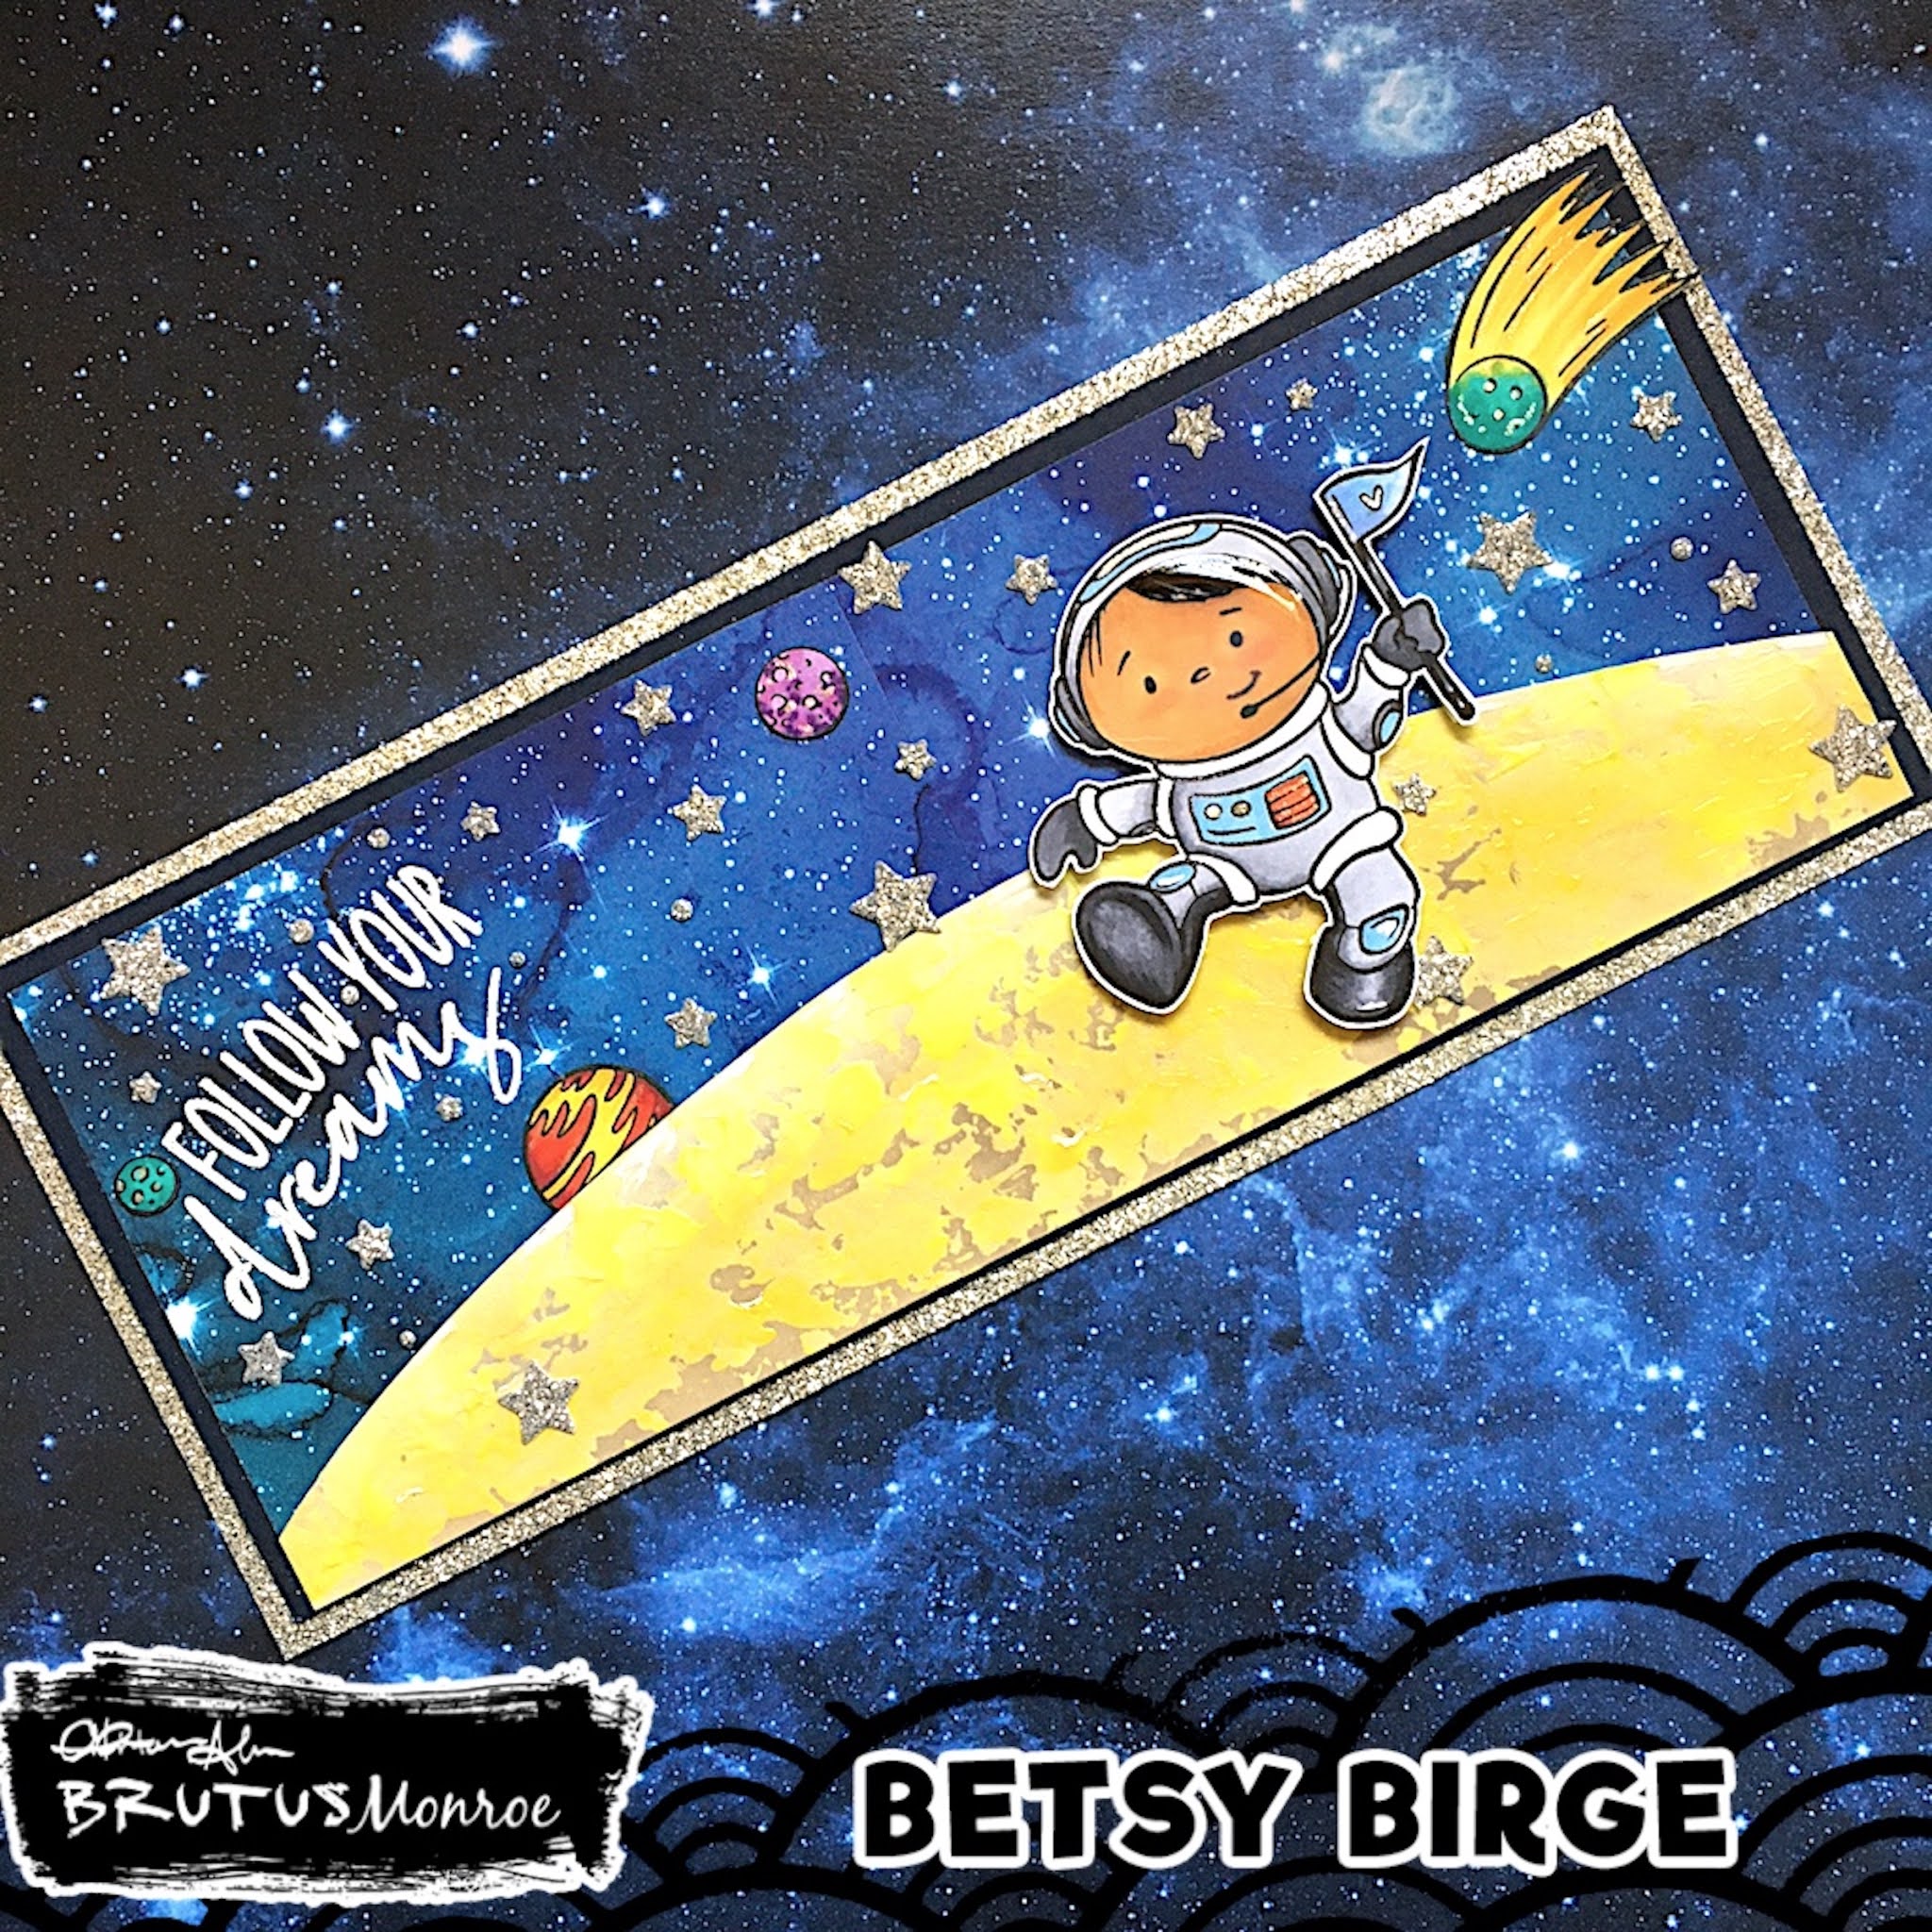
Let me show you how I made my slimline card!
The first thing I did was to chose and prepare my background paper.
I chose the Watercolor Galaxy Paper Collection. However, it is only
6" x 6". So I cut it directly down the center and used a piece of
1/2" Brutus Monroe Tissue Tape to keep the ends butted together.
I didn't remove the release paper at this time. I trimmed the ends so
my finished panel measured 3" x 8".
Next I needed to make the base for my little astronaut to stand on. I
chose a piece of dull yellow card stock and on one end of it, drew an
arc and cut it out.
I wanted to use both the Daffodil Chroma Glaze and the Neon Yellow
Chroma Glaze for texture. So, taking the tip of a palette knife, I
applied the Daffodil first. I applied it sort of thick - thick enough so
my knife skipped over the surface of the card stock. Then to give
it more texture I tapped my finger into the wet glaze.
Without waiting for the Daffodil Glaze to dry I applied the Neon Yellow
Glaze in the same manner applying more at the top of the arc.
I set this aside to dry. I next stamped my sentiment onto the upper
right corner of my patterned paper curving the stamp a bit and heat embossed it with
Alabaster Embossing Powder. I backed the patterned paper panel with
a very dark blue card stock and adhered it onto my 3 1/2" x 8 1/2" card base that
was covered with silver glitter card stock.
Next I stamped my images with Raven Detail Ink. I used 5 of the images -
4 planets plus the little astronaut.
I originally planned on only 3 planets but added in the 4th one
later on in my process. I colored my images with Copic markers.
Copic markers used:
Red: R05, R17, R59, R20
Violet: V12, V05, V09
Blue: BG15, B49, B32, B63
Yellow: Y15, Y38
Grey: C1, C3, C5
Brown: E21, E3, E35
Blender & Black
After these images were colored I fussy cut them and used a black
water-based marker around the cut edges. I did leave a very
narrow white outline around the little astronaut.
By this time, my glazed piece was dry. To accentuate the
texture and give it depth, I first blended Simon Hurley
Woof ink with a blending brush and to the very top curve
of the arc I used Alabaster Pigment Ink to hi-lite. Then I adhered
it to my card base.
Using a die from my stash I die cut various size stars from
the left over silver glitter card stock. I adhered my little astronaut
with foam tape and glued the planets down flat. Then I
adhered the stars. Using a Gel Roll Stardust pen I accented the
planets and bits on the astronaut suit, helmet and flag. I also
added touches with a white gel pen. I used Glossy Accents on the face
of my astronaut to make it more like a helmet and my card was done!
I had so much fun creating this card! And I was really pleased with
how my moon base turned out! Those Chroma Glazes are
Out of This World!!!!!!!!! You can find the supplies I used for
my project today at:
The Inspiration Box is a subscription product. Find it along with all
of the other subscription products
here.
Thanks so much for stopping by. I hope I've inspired you today to
create something you love!
Betsy
In my capacity as a design team member for Brutus Monroe, I do receive the products I use from them.
All opinions and creative decisions remain my own, and I only work with companies/use products that I love.