Showing posts with label Beach Bum. Show all posts

Tuesday, May 31, 2022

Beach Bum with Brutus Monroe


Hello everyone!  I'm hoping all of you are enjoying great weather!  Today I am
sharing more beach vibes with


This giraffe stamp was just too cute not to use this time!  He looks totally ready to
hit the waves!  Let me show you how I made my card!  I first taped a panel of
140lb watercolor paper to my hardboard.  This measured bigger than an A2 size
panel so I could cut it down.


I used a 1/2" flat watercolor paintbrush and used water down Blue Aqua
Pigment for the sky.  The water was Blue and Green Aqua Pigments - not as watered 
down.  In both the sky and water I brought the color to white.  I helped that
along by taking a tissue and absorbing the color very randomly.  My paper
with Aqua Pigment on it was not soaking wet, but damp enough so that the
tissue was able to absorb some of the color.  I did the same for the clouds
in the sky and sea foam.  For the sand I started with Brown, added yellow and then added
water.  Once this was all dry I trimmed this panel out to 3 3/4" x 5".
I stamped my giraffe image on Aqua Pigment Paper and put it on my
Stick & Stamp Mat along with the Pigment Palette.


I laid out my pigments and painted up my image.  I didn't do any shading
on my images...just straight painting.


I painted at least 2 coats on my images, letting them dry in-between.  Once
they were dry I fussy cut the image up to the outline and then ran a black marker
along the cut edges.


I added Glossy Accents to the sunglasses.  While waiting for that to dry, I
stamped my sentiment and birds onto the background.


I next ran a bit of the brown mix right up against the sea foam.  As I was
doing it I was thinking this shadowing makes the sand look more real.  And then
I thought, who am I trying to kid, it's a giraffe with sunglasses holding
a surfboard...LOL!  ðŸ˜‚  Once that was done I added some fine splatter to
the sand.  I used the brown just a bit darker for this.  The on the water, sea
foam and sand I added Fallen Snow Glitter Glaze.  Once that was dry I
popped up the panel onto an A2 size white top folding card base with a piece
of foam.  And then I added the giraffe with the surfboard also popped up
on foam.  And that finished my card!


This Beach Bum Stamp Set has been so fun to create with!  The images
are darling and your creative talents can just run away with this set!  Find
this set and everything else I used at


Thanks so much for stopping by and spending time here!

Betsy

In my capacity as a design team member for Brutus Monroe, I do receive the products I use from them.

 All opinions and creative decisions remain my own, and I only work with companies/use products that I love.


Tuesday, May 24, 2022

Beach Time with Brutus Monroe


Hello everyone!  It's time to break out the beach themed cards and this one
is made out of products from

Brutus Monroe

This was sofun to make!  It's always so inspiring to make your own scene cards.
There's something about them that triggers our memories of time spent on 
the beach!  Let me show you how I made my card.
I first cut an A2 size panel of white card stock.  I ink blended the sand,
water and where the sun would be.  I used Antique Linen for the sand,
Broken China for the water and Scattered Straw for the sun.  I was going for
soft edges and I didn't want the colors to butt up against each other.


I next stamped out my images onto Aqua Pigment paper.  I chose to stamp 3
each of the little bits and just one chair, towel and boat.


I chose to color my images with Copic Markers.  I went with soft
summer colors, although I did deepen the colors later.  Copic colors used:
R00, R02, R05, E31, E33, E35, RV000, RV10, BG 10, BG11,
Y21, R32, E21, Y00


When I fussy cut these images I cut away all of the ground underneath
the beach chair.
I heat embossed with Gilded Sparkle Embossing Powder the sun image from the


I then added my Glitter Glazes...I used a bit of Periwinkle on the water,
Alabaster on the sea foam, and then Fallen Snow on the sun, water, 
sea foam and beach sand.


I cut my panel to 4" x 5 1/4" and mounted it onto a white A2 size top
folding card base with foam for a bit of dimension.
I added my sentiment which was also heat embossed with Gilded
Sparkle Embossing Powder and die cut.


Time to put all of the little elements on and build this beach scene!


After adding the shells I added more Glitter Glaze in Fallen Snow.  I
didn't add a lot, just a bit here and there.  I had an extra crab so I adhered
him to the inside of my card.  And that finished my beach card!


This card was fun to make...especially adding all of the little elements that
truly brought my card to life!  You can find the products that I used at

Brutus Monroe

Thanks so much for stopping by and I hope I've inspired you!

Betsy

In my capacity as a design team member for Brutus Monroe, I do receive the products I use from them. 

All opinions and creative decisions remain my own, and I only work with companies/use products that I love.






Tuesday, May 10, 2022

Beach Bum with Brutus Monroe


Hello everyone!  Summertime is right around the corner and today I'm
sharing a cute summertime card with products from:


This is a really cute set to get creative with to make beach themed cards!  Let
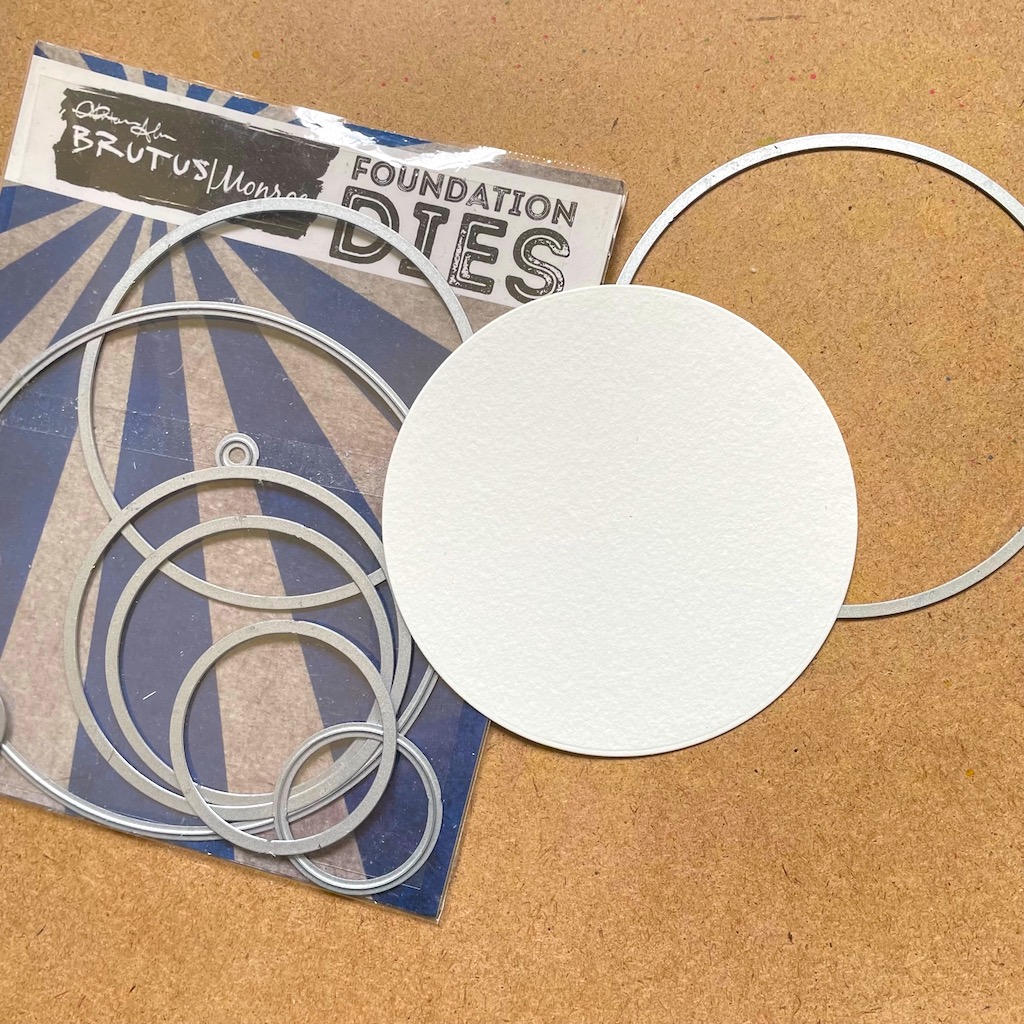
me show you how I made my project!  I first took the Circle Foundation Dies and
cut a 3 3/4" circle from 140lb watercolor paper.


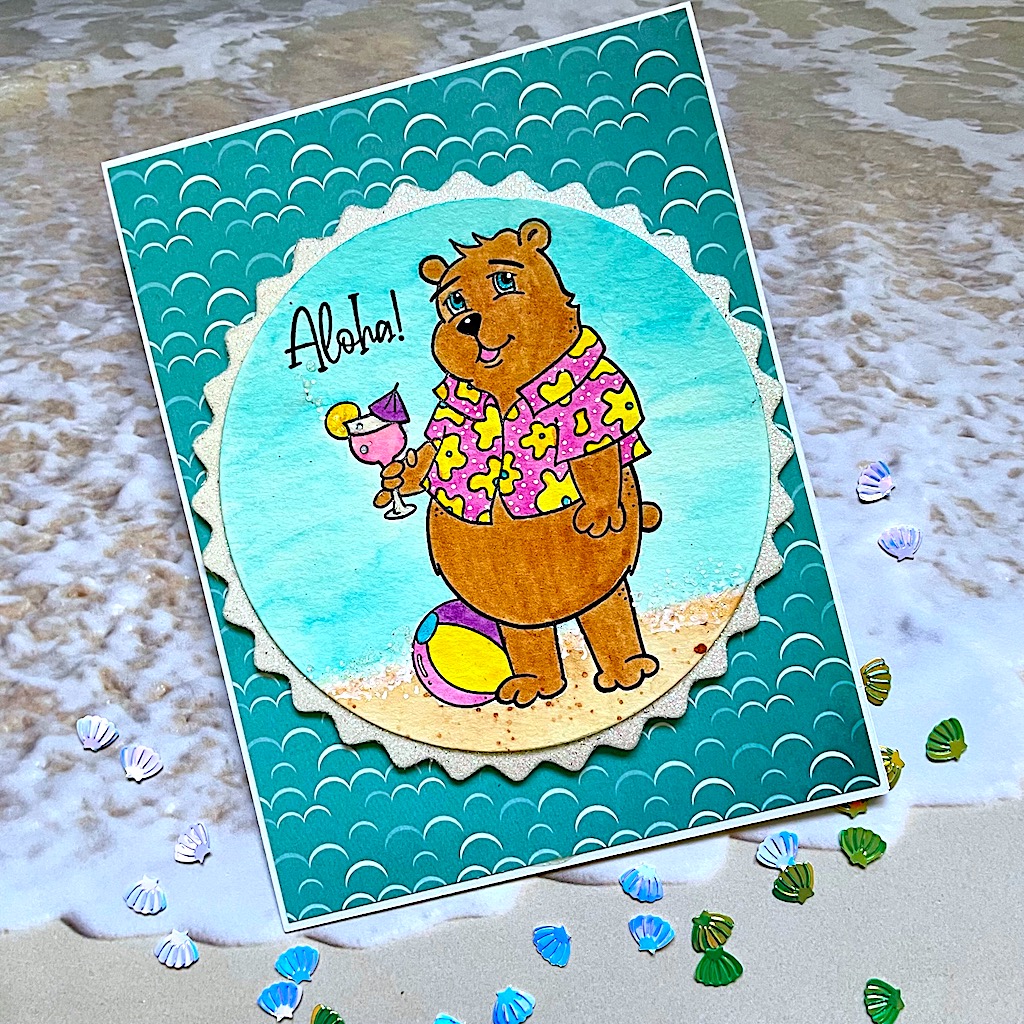
Next I stamped my bear image, masked off his feet and then stamped the
beach ball and the sentiment with pigment ink.


I chose a piece of paper from the Sea Life Paper Collection to key my
colors for painting with Chroma Mists.  


I started with the sand.  To make
the sand color, since there is no brown Chroma Mist, when any 2 secondary
colors are mixed together they usually create brown.  I used the Yellow Orange
and Lilac Purple.  I made a watery mix of this for the sand.


I made this mix stronger - with no water added - and painted my bear.  After
painting the sand I moved onto the rest of the background round which was
straight Turquoise and water added.  After the background was done I painted
the rest of the elements.


I used Pink, Bumblebee Yellow, Turquoise, Lilac Purple and Yellow Orange.
Notice I still have a black ink smudge between the drink and the sentiment.
I'll be dealing with that next!  I took a white gel pen and made dots in the
bear's shirt and where the sand meets the blue water and also coming
off the drink (particularly on top of the ink smudge!).


I prepared a standard A3 size top folding white card base.  I die cut
a wavy circle out of white glitter paper and adhered it behind the
focal circle.  This give it a bit of a frame.  Using Fallen Snow Glitter Glaze,
I applied with a Q-tip to the waterline, the lemon on the drink, and the
little bubbles coming out.  This completely took care of the ink smudge.
I used Glossy Accents on the glass and a shimmer pen on my bear's eyes
and my card was finished!


This was a fun project to create!  This is a huge 17 pc stamp set!  So
many possibilities - keep your eye out all month long for creations from
the Inspiration Team!  Find the products I used at


Thanks so much for stopping by!

Betsy

In my capacity as a design team member for Brutus Monroe, I do receive the products I use from them. 

All opinions and creative decisions remain my own, and I only work with companies/use products that I love.


A Pirate's Life! ft. Kate Hadfield Designs

  Hello everyone!  Today I'm sharing this adorable pirate-themed wiper card.  A fun card to put together!     I'll be using products...