Tuesday, June 28, 2022

Summerlicious Release with Joy Clair Designs


Hello everyone!  It's time for a new release at

Joy Clair Designs
Summerlicious 
For all of you Joy Clair Designs fans this is such a beautiful release!  So
many florals and beautiful images and meaningful sentiments.  Today
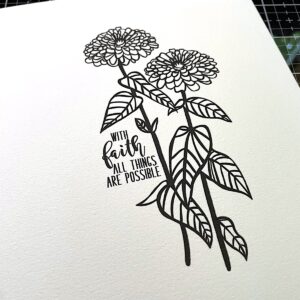
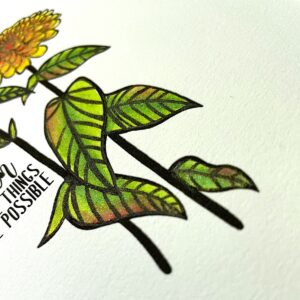
I'm featuring the "My Path" digital stamp set.  This is so pretty and the
butterfly really set my creative mind into high gear!  Let me show you
how I made my card!


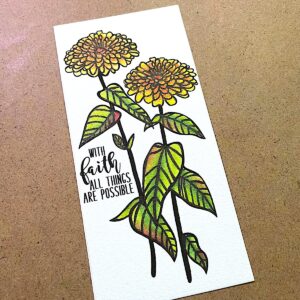
As always, I started my card by composing it in my computer.  I only
have an inkjet printer so no fancy equipment.  I printed the image out
onto copy paper and then tape my piece of watercolor paper over it and
send it through the printer again.


My watercolor paper is Bee paper that is 140lb weight.  It prints up
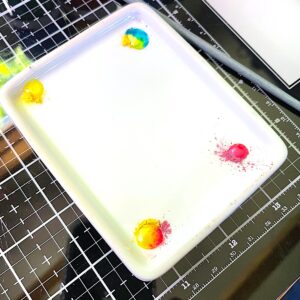
beautifully and is nice to paint on.  I decided to use watercolor color
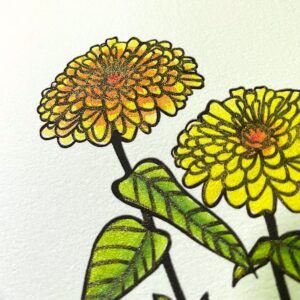
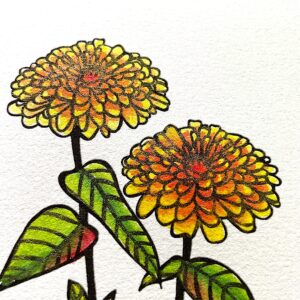
pencils.  Any brand would work well.  I started by coloring my big
butterfly.  I lay in all my color first - shading colors and base colors,
blend it out with a wet paintbrush.Then, when that layer is dry I can 
go in with another layer.


I moved along with my colors trying to balance out tones and trying new
color combos on each flower.  


Once the coloring was complete, using a rectangle die, I traced around the
die with a pencil where I wanted to cut the image.  I couldn't actually use the die because
the wing of the butterfly was deliberately off the page.  I cut it by hand, cutting
right up again the butterfly wing bits.  I ran a black waterbed pen around the
wing parts that were sticking out.


Next I made a white top folding A2 card base from white card stock.  I cut
a black/grey plaid panel to 4" x 5 1/4".  I cut a piece of black card stock that
is 4 1/8" x 5 3/8".  I mounted the plaid onto the black and then that whole
panel onto the card base.  I backed the stamped panel with a bright yellow/
orange card stock.


When I went to adhere the stamped panel onto the card, I realized I had to
off set the stamped panel to accommodate the butterfly. Even though it's not centered,
 I liked how this looked.  To add something sparkly to this card, I used a gold glitter
 pen and filled in all the little berry parts on the image and the inside bits of the
flowers.  I also added a bit to the veining in the leaves.  I used a shimmer
pen on the body of the butterfly as well as the white dots on the wings
and where the wings meet the body.  And that finished my card!


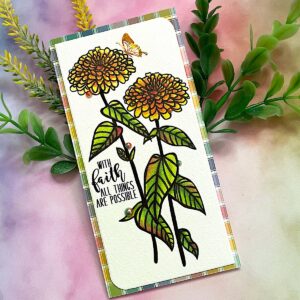
Here is another card I made with this same set!


Here is the link to the entire collection:

Here is the link to the Joy Clair Blog that will show you all
of the beautiful cards the team has made with this release!

Are you new to digital stamping?  Not really sure how to do it?
Please feel free to ask any one of us your questions.  Digital
stamping is such a great way to stamp on a budget or buying a
stamp set when you need it immediately!  Just ask us!

Thanks so much for stopping!  I hope you love this release as much
as I do!

Betsy

In my capacity as a design team member for Joy Clair Designs, I do receive the products I use from them. 

All opinions and creative decisions remain my own, and I only work with companies/use products that I love.


Painted Rainbow with Brutus Monroe


Hello everyone!  Today I'm continuing the rainbow theme with products from


This was so much fun to make - especially working with all that sparkly goodness
found in the Candy Coat!  Let me show you how I made my card.  I started my card using
a piece of 110lb white card stock that was cut to around 4" x 8".  I wanted plenty
of room to work with.  Using my Stick & Stamp Mat and the Painted Rainbow 
Stencil, I used Candy Coat as my medium.  I used Pink, Yellow, Green Teal
and Purple.  To make the orange I mixed Yellow and Pink and to make the blue,
I mixed Teal and Purple.


I let this dry overnight.  I had applied the Candy Coat quick thickly for good
coverage and bright color so it took a while to dry.  When it was dry I cut the
panel to 2 3/4" x 5 3/4".  I made a 3" x 6" mini slimline card base and 
adhered a piece of hot pink holographic paper to it just an 1/8" smaller. Using 
some heat resistant acetate I stamped my rainbow images and shooting
star and sentiment with black pigment ink.  Then I used Rainbow Sparkle
Embossing Powder to heat emboss.  Super easy to cut out and you really don't
see the edges in the finished project! 


 I backed my stenciled piece with 3
layers of the 110lb card stock.  I did this to give it dimension but to also
ensure that the stenciled piece didn't warp the entire front of my card.  It
made the card super stable.


With the rainbows and star from the Radiant Rainbow Stamp Set I was able to trim
out my images and then actually flip them over before adhering.  This made for a
crisper image, but you  can still see the sparkle from the embossing powder.  I
adhered these elements flat to the surface and my rainbow card was done!


I hope you enjoyed today's fun rainbow tutorial.  Everyone should have some sort
of rainbow collection in their stash and this stencil is awesome!  Find it and the
other products I've used at


Thank you so much for stopping by!  Have a great week!

Betsy

In my capacity as a design team member for Brutus Monroe, I do receive the products I use from them. 

All opinions and creative decisions remain my own, and I only work with companies/use products that I love.


Friday, June 24, 2022

You Make Me Proud with Joy Clair Designs


Hello everyone! Today sharing this sweet card featuring digital stamp from:

Joy Clair Designs

 This is such a sweet digital set with plenty of floral images and different sentiments!  Let me show you how I made my card.  As always, I started by composing my design and sentiment in the computer.  I print it out onto copy paper and then I taped a piece of watercolor paper over the image and sent it through my printer.  I used Bee 140 lb. watercolor paper that I purchased on Amazon.

I wanted to paint my flowers with Nuvo Shimmer Powders.  I only used 3 colors:  Solar Flare, Blue Blitz and Cherry Bomb (I've been watching Amy Rysavy lately!).  I took a small palette and put color into each of the 4 corners and gently mixed it with a little water.

I used the yellow and blue to make green, the yellow and red to make orange.  I painted the image with these painted and slightly blended the paint.

The line work in the design is quite heavy so it can support the very bright color and sparkle these Shimmer Powders give.  I kept painting and adding color until I was happy with the design.


I added a little straight, yellow, red and orange to the leaves here and there.  This just gives interest to an otherwise fairly flat green color.  Note that the shimmer is obscuring some of my black lines.  To fix that I went over the lines with a .5 black waterproof pen.

I die cut the image with a min slimline die and rounded the corners on the bottom left and top right.

I made a mini slimline card base from white card stock and covered it with a soft rainbow plaid paper.  I adhered my painted panel onto this.  For embellishments I added some 2-toned pearls and a small gold butterfly sticker (nail stickers from Amazon).  And that finished my card!

I hope you enjoyed today's tutorial.  This is a simple card that works really well for encouraging others in your life!  Look for this design and many other beautiful floral digital stamps at

Joy Clair Designs

Thank you so much for stopping and spending time here!  I hope I've inspired you!

Betsy

In my capacity as a design team member for Joy Clair Designs, I do receive the products I use from them. 

All opinions and creative decisions remain my own, and I only work with companies/use products that I love.

Tuesday, June 21, 2022

Radiant Rainbow with Brutus Monroe


Hello everyone!  Hope everyone is having a great start to their summer!  Today
I get to bring you a fun project using products from


This is such a pretty card and so easy to make!  Let me show you how I made it!
I started by taking a piece of heavy weight white card stock that was cut to
6" x 4".  I laid it on my Stick & Stamp Mat.  I used the Painted Rainbow Stencil 
and a 1/2" flat damp brush, I sprayed Chroma Mists onto my work surface, picked it 
up with my brush and painted each stripe on the rainbow.  One or two swipes of the 
brush was all I did, as I didn't want any of the Chroma Mists to seep under the stencil.


Once this was dry, I cut the panel so it was 2 3/4" wide.  With the left over
piece of stenciled card stock I used a zig zag die and I ended up placing this
inside my card.  I also cut the black bow but decided not to use it.  The colors
of Chroma Mists were: Lilac Purple, Pink, Yellow Orange, Leaf Green,
Turquoise and Blue Violet.  They make such a pretty rainbow!  I next
heat embossed my sentiment from the Radiant Rainbow Stamp Set
using black pigment ink to stamp and then heat embossed with Rainbow 


I decided to use the small hearts from the stamp set and hang them on each
of the rainbow stripes.  I, once again, used black pigment ink to stamp them.
I then drew a line connecting them to the top with a black pen.  I laid a
yellow sparkle peel-off across the top of the card.  


I used a shimmer pen on each one of the hearts, then filled them in with
Glossy Accents.  I put a clear iridescent tiny gem stone on the end of 
the strings and my rainbow card was finished!


I hope you enjoyed today's easy tutorial!  It doesn't have to be
complicated to get the message across to your recipient!  Find
the products I used here today at


Thanks so much for stopping by today!

Betsy

In my capacity as a design team member for Brutus Monroe, I do receive the products I use from them.

 All opinions and creative decisions remain my own, and I only work with companies/use products that I love.


Tuesday, June 14, 2022

Be Happy Cutting Dies with Brutus Monroe


Hello everyone!  Today's project is super cute, happy and sparkly!  I'll be
using products from


This shaker easel card was fun to make and I came up with a technique to really
customize your product!  Let me show you how I made my card!
I first started by die cutting my rainbow and bird out of white card stock and placing
them on my Stick & Stamp Mat.


I didn't have the colors I was looking for to do this project, so I took Fallen Snow
Glitter Glaze and mixed a bit of Chroma Mists into it for each color.  The Chroma
Mist colors that I used were: Pink, Yellow Orange, Yellow Green, Blue Violet,
Lilac Purple and Turquoise.


I pulled these off my mat, cleaned my mat and then let these pieces dry.  I also
die cut 3 of the sparkles using Sterling Elegant Essentials.  Once everything was
dry I mounted my rainbow strips onto the base - there is a die for that.  I also put
my bird together and used a black marker for the eye and legs.


 I made a 4 1/4" x 4 1/4" white card base.  I
scored the front of the card in half to create my easel.  I made a panel of
what card stock for the upper half that was 4" x 2".  I inked blended in
a sky using Simon Hurley's breakup blue ink. 


For the bottom half of the card - the shaker part - I cut the same
2" x 4", but also allowed for the rainbow someplace to sit.  I then
die cut the two little clouds that would become the shaker.  I
ink blended on this panel as well.  Next I die cut the bottom of
the rainbow on both sides to accommodate the shaker holes.


I put foam tape on the back of the panel but not the top of the rainbow part.  I
filled the cloud part with rainbow confetti and some other bits.


Next I adhered my rainbow.  I put an acetate strip behind the bird and attached
him to the rainbow.  I adhered my twinkle pieces and added some small silver
twinkle bits for added sparkle.  I also die cut a few clouds and used them on the
top portion along with more twinkle bits.
For the inside I cut another 4" x 4" panel and ink blended it the same as the
front pieces.  I die cut 3 of the shadow layers of the sentiment out of white
card stock.  I die cut the letters out of coordinating card stock to make a rainbow
when glued together.  I added Fallen Snow Glitter Glaze on top of the letters
to make them sparkle.


And that finished my card!


And that finished my card!  I hope you enjoyed this sparkly shaker card!  So
fun to create with all of these dies!  Find this set and more at

Brutus Monroe

Thanks so much for spending time here today!

Betsy

In my capacity as a design team member for Brutus Monroe, I do receive the products I use from them. 

All opinions and creative decisions remain my own, and I only work with companies/use products that I love.


Count Me In with Texture with Joy Clair Designs