Showing posts with label Vintage Tile. Show all posts

Tuesday, April 26, 2022

Vintage Tile Take 2 with Brutus Monroe


Hello everyone!  Today I'm sharing another card made with


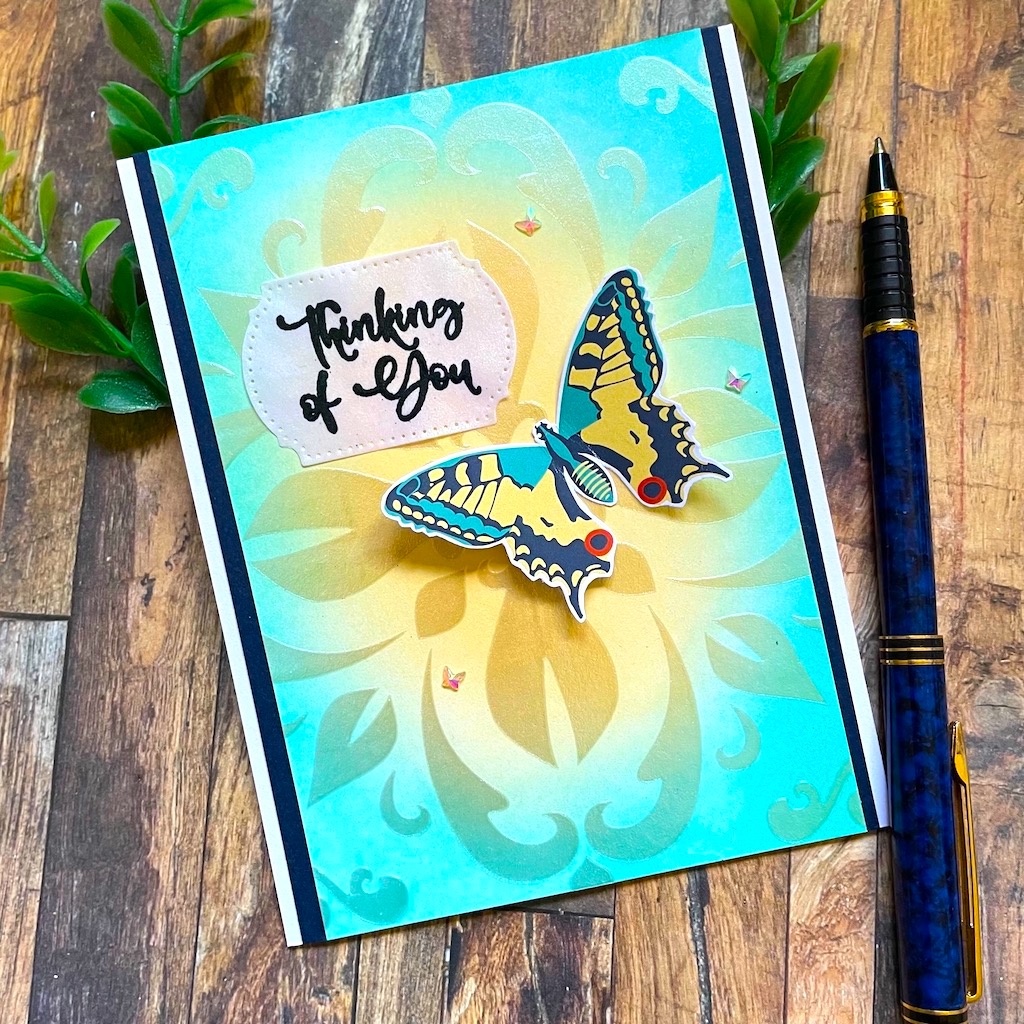
I wanted to see what the Chroma Glaze would do over an inked background.  I
am in love with the way it turned out!  Let me show you how I made my card!
I first ink blended my A2 size card base panel on heavy white card stock.  I used Simon
Hurley Inks in Over the Moon and Tropical Tango using my Stick & Stamp Mat.


I was color matching this to a piece of patterned paper from the Bountiful
Blooms Paper Collection as I was going to fussy cut one of the butterflies.
Before this ink was dry I placed my Vintage Tile Mixed Media Stencil over
top of the panel and using Opal Chroma Glaze ( a new fav!!!) I
applied a very thin coat.


This did not blend with the ink as much as I thought it would, but that's ok.  I
didn't do a lot of smoothing out...I applied it, scraped it even with a palette
knife, took off the stencil, took my panel from my Stick & Stamp Mat and let
everything dry.  I chose the butterfly I wanted and fussy it out along with one
of the flowers and a few of the yellow leaves.


Next I took a piece of white pearlized vellum and heat embossed my sentiment
on it with Night Shift Embossing Powder in Teal...so pretty!  Once it was cooled
I die cut it with a small label die.


I made a standard white A2 size top folding card base from white card stock.  I
cut a piece of navy yardstick to 4" x 5 1/2" and adhered it, centered, on the
card base.


I cut my inked/stenciled panel flat to the card centering it.  It measures
3 7/8" x 5 1/2".  I adhered my butterfly by applying liquid glue just to the
center of it.  I adhered my sentiment in the upper left and used a bit of liquid glue
to adhere it.  Because this is pearlized you can't really see though it like
most vellum.  I adhered the red flower and 3 little leaves I had fussy cut from the paper
 inside my card.  For a finishing touch I adhered 3 tiny iridescent butterflies
and my project was done!

This was fun to create and I love experimenting with different mediums.  I
really love this Opal Chroma Glaze over the ink.  It's so pretty!  You can find
the products I used for this card at


Thanks so much for stopping by and hanging out here today!

Betsy

In my capacity as a design team member for Brutus Monroe, I do receive the products I use from them. 

All opinions and creative decisions remain my own, and I only work with companies/use products that I love.


Tuesday, April 5, 2022

Vintage Tile with Brutus Monroe


Hello everyone!  Today I get to share a new stencil technique with
you featuring products from 


This was tons of fun to put together.  It was in experiment for me - I stenciled
my panel 3 times!  Let me show you how I made my card!
I first started by placing a panel of white card stock on my Stick & Stamp Mat.
I used Simon Hurley's breakup blue ink and the Delicate Floral Stencil.


This is such a pretty stencil on it's own.  Next I overlaid the Vintage Tile
Stencil and used Glitter Glaze in Periwinkle.


I was very careful about placement of this stencil.


This came out so pretty!  I love the Delicate Floral design in the background.
Once this Periwinkle Glitter Glaze was dry, I rotated my stencil and used
Alabaster Glitter Glaze to stencil again.


I had to peel off my panel each time I stenciled so I could clean off my Stick
& Stamp Mat.  Then I just set my panel aside to dry.  When t was dry I
cut it to 4" x 5 1/4" and adhered it to a Blue Ribbon Card Stock panel that
was cut to 4 1/8" x 5 3/8".  I next moved onto my sentiment.  I used the
"Thanks" die set from Christopher's Sentiments dies.  I die cut the actual letter from 
the Blue Ribbon Card Stock and the shadow layer from some very
white vellum and adhered the 2 together.


I felt I needed a sub-focal so using Icicle Embossing Powder, I used one of
the butterflies from the Full Bloom Stamp Set and die cut it with the
coordinating dies.  I stamped the butterfly, heat embossed it and then ink
blended over it with the breakup blue ink.


I die cut the butterfly and then added Periwinkle Glitter Glaze for
some sparkle.


I adhered my prepared panel onto an A2 size white card base.  I adhered
my sentiment piece flat to the card.


I adhered my butterfly above the sentiment on the right.  As a last
finishing touch I added some iridescent confetti and
my project was finished!


I hope you enjoyed today's tutorial.  It was fun to see what would happen
when stenciling the same panel 3 times!  I love the effect!  You can purchase the
products I used at


Thank you so much for spending time with me here today!

Betsy

In my capacity as a design team member for Brutus Monroe, I do receive the products I use from them. 

All opinions and creative decisions remain my own, and I only work with companies/use products that I love.