Tuesday, August 30, 2022

Bowl of Strawberries with Brutus Monroe


Hello everyone!  As the last of summer slips away from us I am sharing one
more luscious strawberry card using products from


I love the color combo of red, white and turquoise!  So clean and fun!  Let me
show you how I made my card.
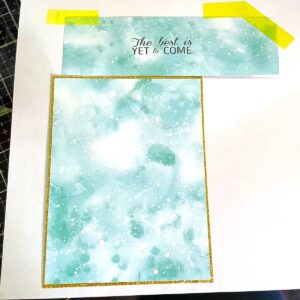
I started with my background panel.  I used a piece of Lagoon card stock and
the Basket Weave Stencil.  I cut the panel bigger than I needed and stenciled
with Opal Chroma Glaze.  This is a great way to add texture and dimension
without adding more color.


I chose the elements from the Strawberry Social Stamp Set for my card
and stamped them onto watercolor paper.


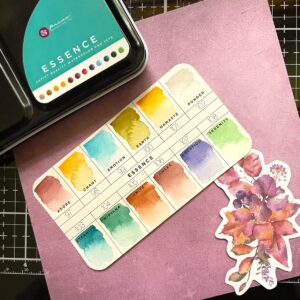
I used Choma Mists to paint my images.  I used Candy Apple Red for the
strawberries.  Yellow Green was used for the strawberry tops. 


 For the bowlI painted stripes using Turquoise and a touch of the Yellow Green.  
I mixed it once and painted the top and bottom stripe.  This really was too blue
so I added more of the green and painted over them.


I didn't painted the whipped cream at all. I fussy cut my images. I created a white A2 size
 card base with the fold along the top.  I cut a piece of red card stock that is 4" x 5 1/4".
I cut my stenciled panel to 3 3/4" x 5" and adhered both of those to the white
card base.  I made my sentiment using white card stock.  I stamped the
sentiment in black ink and then added red die cut card stock behind that.


  I cut a thin strip of white card stock and layered that on top of a die
cut scalloped piece of red card stock.  To adhere my bowl of strawberries
only the extra whipped cream piece is adhered flat to the card.  I added
the double strawberry piece to the top of the pile of strawberries and
 foam taped the entire bowl piece to the right side of the card over the
striped border.  I added the extra strawberry at the bottom on top of
the bowl on foam tape.  I added some iridescent confetti and Fallen
Snow Glitter Glaze to the berries.  I adhered a red acrylic heart under
the sentiment and my card was done!


I hope you enjoyed today's tutorial.  It's always sad to see summer go along
with all of the delicious fresh fruit!  You can find the products that I used at


Thanks so much for being here!

Betsy

In my capacity as a design team member for Brutus Monroe, I do receive the products I use from them. 

All opinions and creative decisions remain my own, and I only work with companies/use products that I love.


Wednesday, August 24, 2022

Above & Beyond with Joy Clair Designs


Hello everyone!  Today I'm sharing a floral card with a fall feel!  I am always ready for fall after the heat of the summer and fall cards are just so wonderful to create!  Today I've chosen one of the images in the Above & Beyond Digital Stamp Set from the Summerlicious Release from Joy Clair Designs!  

Let me show you how I made my card.  For this card, I chosen some elements to work with that would govern the colors that I used.

I would be using the piece of mauve paper as the background for my card.  The die cut provided the color palette which I found in this paint palette.  I printed out my design onto watercolor paper along with the sentiment. 

Using the die cut and the paper as a guide I watercolored my image.

I like to start with my leaves first. I always use more than 2 colors on my leaves.  They support the main elements which are the flowers and they can get lost pretty easily.  I try to make them subtly stand out by painting them sometimes up to 7 different colors.  I probably used about 5 total here.

I tried to keep the top and bottom flower fairly consistent with one another so the middle one could stand out a bit more.

Once that was painted and fairly dry I decided to go with a sentiment from the  Always In Style digital stamp set.  I wanted it printed right on my background paper so I dropped in the sentiment onto my digital file and taped my background paper to the original watercolor piece and sent it through but this time upside down.

As you can see from the photo, it didn't get in the way of my painted piece at all.  Next I fussy cut my flower piece, edged it with a black marker and then trimmed the background panel.  I covered a white top folding A2 size card base and covered it with a deep burgundy card stock.

I adhered my floral piece flat to the card.  I used a glaze pen to go over the Thank You for a bit of added shine and texture.

For added sparkle I added some gold holographic confetti and that finished my card!

I hope you enjoyed today's tutorial and I've inspired you to create something beautiful!  The Digital Stamp Sets are so gorgeous!  See them all at

Joy Clair Designs

I hope I've inspired you today.  Thanks so much for spending time here!

Betsy

In my capacity as a design team member for Joy Clair Designs, I do receive the products I use from them. All opinions and creative decisions remain my own, and I only work with companies/use products that I love.


Sunday, August 7, 2022

You Fill My Day Butterflies with Joy Clair Designs


Hello everyone!  Today I'm here with more inspiration from the 

Joy Clair Designs

Summerlicious Release 

You Fill My Day Digital Stamp Set

This is such a beautiful image to work with.  Let me show you how I made my card!

As usual, I started in the computer with the butterfly image.  I sized it.  I would get back to the sentiment later on in my process.  I printed this out onto white copy paper.

This quite an intricate image.  I wanted to stamp it onto patterned paper.  The paper would have to be  quite plain without too much of a pattern.  I wanted to make 3 butterflies.  I took my patterned paper and taped it to the copy paper over the butterfly image and sent it through my printer.

I did this 3 times on different colors of paper: blue/green, blue and aqua.  Then I trimmed them down so I could color them with my Copic Markers.  I let the paper color govern the marker colors here.  I used more of a green color combo on the blue/green paper, a blue blend on the blue paper and an aqua blend on the aqua paper.

I did minimal shading on these and I didn't color everything.  I just filled where I thought it would bring out the pattern in the butterfly.  After coloring I fussy cut them.

For the Green I used: G00, G02, G12, G05.  For the Aqua I used: BG01, BG05, BG18.  For the Blue I used:  B32, B23, B24, B28.  There are some tiny dots of black throughout the design.  I used a gold glitter pen and went over these dots.  I also filled in a few places.

I chose a piece of background paper.  It had a similar feel as the paper I printed the butterflies on but it was from another company.  I cut a panel of it for the background at 4" x 5 1/4".  With a scrap of that paper, I printed off my sentiment.

I felt the background panel was going to need something else besides the A2 white top folding card base that I had made, so I cut a piece of gold glitter paper just 1/8" bigger.  These really looked beautiful together.

I die cut my sentiment with a banner die and backed it with the gold glitter paper, leaving a narrow amount showing.  I also used a shimmer pen on the bodies of the butterflies and then put Gloss Accents on them and let them dry.  Time to put my card together.  I adhered my main panel to the card base.  Then I played around the with the placement of the butterflies.  I soon realized that using all 3 butterflies was not going to work visually.  So, I adhered the Blue and the Aqua butterfly to the front.  I bend up their wings before gluing them on.  The I tucked my sentiment in-between them.  For the last bit of sparkle I used moonstone confetti.  I was going to use gold but I realized that they would detract from the butterflies and the gold glitter paper.  The moonstone still gives sparkle without overtaking the background!

Thanks so much for coming today.  I hope you'll give this a try and make your own beautiful creation!

You can find the entire Summerlicious Release here!

Joy Clair Designs

Til next time

Betsy


Perfect Peony with Polkadoodles

  Hello everyone!  Today I'm bringing you more Spring goodness with this gorgeous digital stamp set from Polkadoodles Perfect Peony Digi...