Showing posts with label Opal Chroma Glaze. Show all posts

Tuesday, August 30, 2022

Bowl of Strawberries with Brutus Monroe


Hello everyone!  As the last of summer slips away from us I am sharing one
more luscious strawberry card using products from


I love the color combo of red, white and turquoise!  So clean and fun!  Let me
show you how I made my card.
I started with my background panel.  I used a piece of Lagoon card stock and
the Basket Weave Stencil.  I cut the panel bigger than I needed and stenciled
with Opal Chroma Glaze.  This is a great way to add texture and dimension
without adding more color.


I chose the elements from the Strawberry Social Stamp Set for my card
and stamped them onto watercolor paper.


I used Choma Mists to paint my images.  I used Candy Apple Red for the
strawberries.  Yellow Green was used for the strawberry tops. 


 For the bowlI painted stripes using Turquoise and a touch of the Yellow Green.  
I mixed it once and painted the top and bottom stripe.  This really was too blue
so I added more of the green and painted over them.


I didn't painted the whipped cream at all. I fussy cut my images. I created a white A2 size
 card base with the fold along the top.  I cut a piece of red card stock that is 4" x 5 1/4".
I cut my stenciled panel to 3 3/4" x 5" and adhered both of those to the white
card base.  I made my sentiment using white card stock.  I stamped the
sentiment in black ink and then added red die cut card stock behind that.


  I cut a thin strip of white card stock and layered that on top of a die
cut scalloped piece of red card stock.  To adhere my bowl of strawberries
only the extra whipped cream piece is adhered flat to the card.  I added
the double strawberry piece to the top of the pile of strawberries and
 foam taped the entire bowl piece to the right side of the card over the
striped border.  I added the extra strawberry at the bottom on top of
the bowl on foam tape.  I added some iridescent confetti and Fallen
Snow Glitter Glaze to the berries.  I adhered a red acrylic heart under
the sentiment and my card was done!


I hope you enjoyed today's tutorial.  It's always sad to see summer go along
with all of the delicious fresh fruit!  You can find the products that I used at


Thanks so much for being here!

Betsy

In my capacity as a design team member for Brutus Monroe, I do receive the products I use from them. 

All opinions and creative decisions remain my own, and I only work with companies/use products that I love.


Tuesday, April 26, 2022

Vintage Tile Take 2 with Brutus Monroe


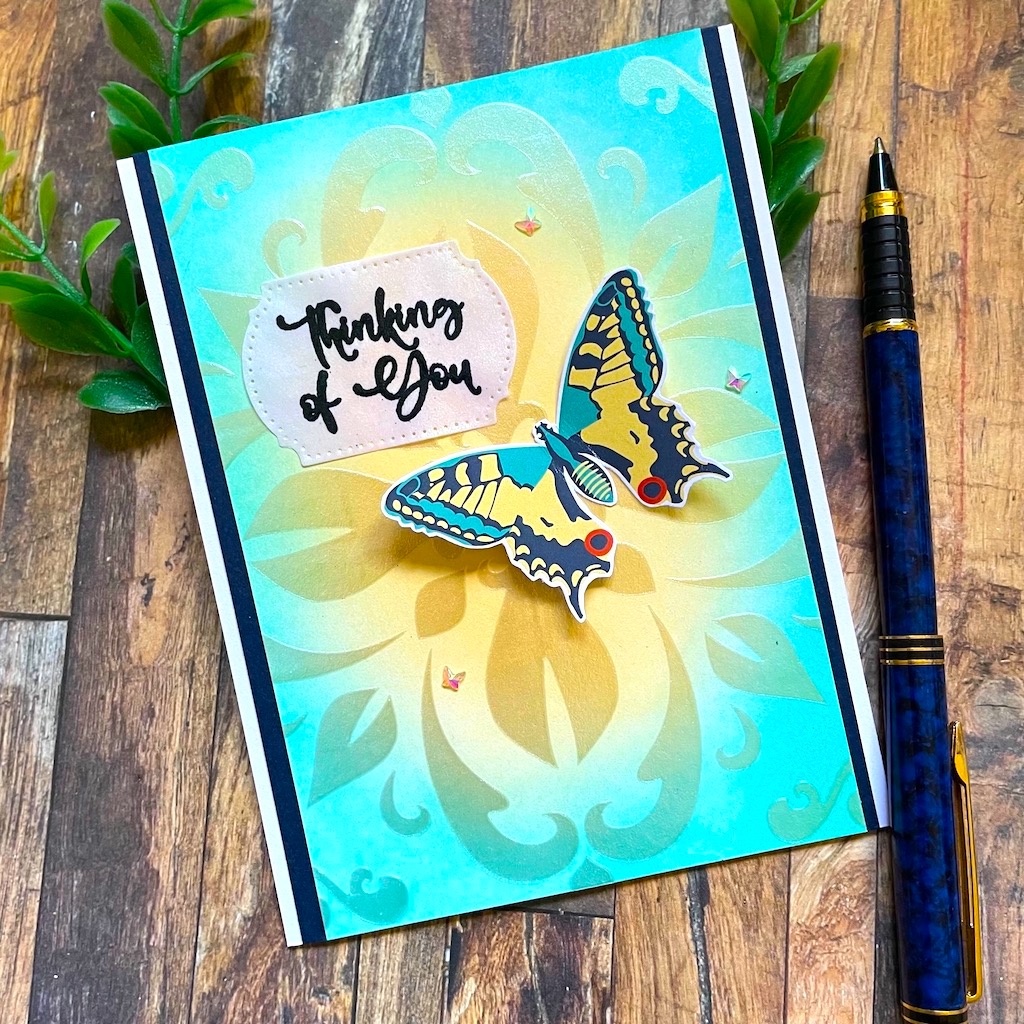
Hello everyone!  Today I'm sharing another card made with


I wanted to see what the Chroma Glaze would do over an inked background.  I
am in love with the way it turned out!  Let me show you how I made my card!
I first ink blended my A2 size card base panel on heavy white card stock.  I used Simon
Hurley Inks in Over the Moon and Tropical Tango using my Stick & Stamp Mat.


I was color matching this to a piece of patterned paper from the Bountiful
Blooms Paper Collection as I was going to fussy cut one of the butterflies.
Before this ink was dry I placed my Vintage Tile Mixed Media Stencil over
top of the panel and using Opal Chroma Glaze ( a new fav!!!) I
applied a very thin coat.


This did not blend with the ink as much as I thought it would, but that's ok.  I
didn't do a lot of smoothing out...I applied it, scraped it even with a palette
knife, took off the stencil, took my panel from my Stick & Stamp Mat and let
everything dry.  I chose the butterfly I wanted and fussy it out along with one
of the flowers and a few of the yellow leaves.


Next I took a piece of white pearlized vellum and heat embossed my sentiment
on it with Night Shift Embossing Powder in Teal...so pretty!  Once it was cooled
I die cut it with a small label die.


I made a standard white A2 size top folding card base from white card stock.  I
cut a piece of navy yardstick to 4" x 5 1/2" and adhered it, centered, on the
card base.


I cut my inked/stenciled panel flat to the card centering it.  It measures
3 7/8" x 5 1/2".  I adhered my butterfly by applying liquid glue just to the
center of it.  I adhered my sentiment in the upper left and used a bit of liquid glue
to adhere it.  Because this is pearlized you can't really see though it like
most vellum.  I adhered the red flower and 3 little leaves I had fussy cut from the paper
 inside my card.  For a finishing touch I adhered 3 tiny iridescent butterflies
and my project was done!


This was fun to create and I love experimenting with different mediums.  I
really love this Opal Chroma Glaze over the ink.  It's so pretty!  You can find
the products I used for this card at


Thanks so much for stopping by and hanging out here today!

Betsy

In my capacity as a design team member for Brutus Monroe, I do receive the products I use from them. 

All opinions and creative decisions remain my own, and I only work with companies/use products that I love.