
Thursday, February 24, 2022
Tuesday, February 22, 2022

Tuesday, February 15, 2022
Blanket of Blooms with Brutus Monroe

Hello everyone! Today I'm sharing a project with new products from
I also used the new Stick & Stamp Mat for my stenciling. The Glitter
Glaze I'm using today is Fallen Snow. This is definitely my favorite
Glitter Glaze because it's transparent. That means when it dries there is
a lovely sparkly iridescent shimmer that is left that lays over any color
that's underneath it.
Let me show you how I made my card! I started with a die cut panel
of Buttercream Card Stock using a smaller rectangle die.

I laid that on my Stick & Stamp Mat and then positioned the stencil
over it making sure the sides were sticking down securely.
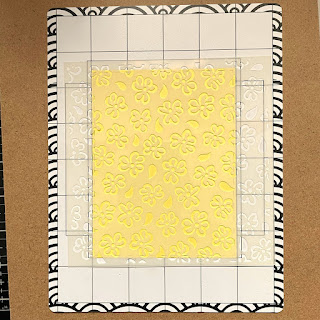
Using pink, yellow and green inks from Simon Hurley's line and a small blending brush,
I applied my ink to the stencil. It didn't slip at all and stayed securely in place while I
was stenciling.

With the stencil still in place I applied my Fallen Snow Glitter Glaze.

Right after the application of the Glitter Glaze I removed my stencil and washed
it. I removed my panel from the Stick & Stamp mat by bending the mat to
release the panel. I set that aside to dry. I took a scrap of pink card stock that
was a very good match to the pink on the panel. Using a palette knife I
applied Fallen Snow Glitter Glaze to this piece.

I let this dry and then die cut my sentiment from it using the
Christopher's Sentiments Die Set. I die cut the shadow piece using
a piece of gold shimmer vellum.

I adhered the 2 together to form my sentiment. I made an A2 size card
base from the Buttercream card stock and then but a green card stock
panel to 4 1/8" x 5 3/8". I tied a pink silk ribbon around the left side
of the stenciled panel.

I adhered the green panel to the card base and then the stenciled panel
popped up on foam tape. I adhered my sentiment down. I took the
Fallen Snow Glitter Glaze and with a Q-tip went over the sentiment again
and I went along the edges of the bow. I also took a toothpick and
made tiny dots between the flowers on the panel. Once all that was
dry my card was finished!

I hope you enjoyed today's tutorial. I love using new products and finding
new ways to use the products I have! You can find what I have used at
Thanks so much for stopping by today!
Betsy
In my capacity as a design team member for Brutus Monroe, I do receive the products I use from them.
All opinions and creative decisions remain my own, and I only work with companies/use products that I love
Monday, February 14, 2022
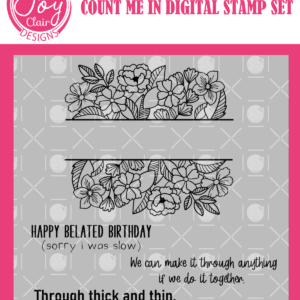
Count Me In with Joy Clair Designs

Hello everyone! Today I get to bring you another one of the awesome designs just released in the Springish Fiesta Release at Joy Clair Designs. This week I'm using the Count Me In Set.
I really wanted to color this image with my Faber-Castell Polychromos Colored Pencils. I love how they look on Kraft card stock. I composed my image and sentiment in the computer and printed it out onto Neenah Desert Storm card stock. I printed it on the upper half of the sheet so I could use the other half for the card base.
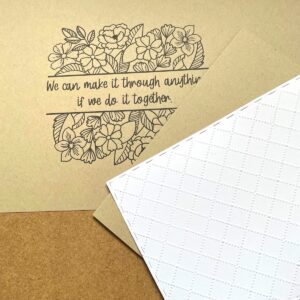
I also die cut a white panel and embossed it with a lattice embossing folder. Now I was ready for the coloring...my favorite part! 😃
I started by Google Imaging Spring Floral Color Palettes and found one I really liked. Then I went to my colored pencils and chose the lightest shade of each of the colors. I lightly colored the image so I knew where I was going with it. Then I chose a mid-tone and dark tone of each of the light tones. I started laying in color eventually pressing harder with the pencils.
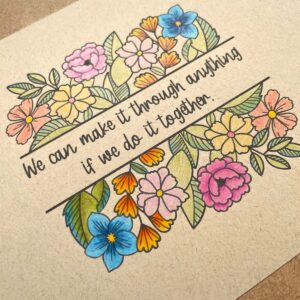
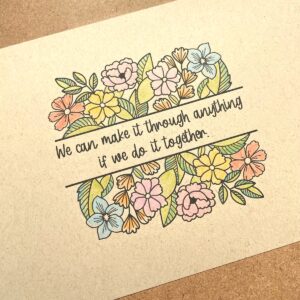
I was really liking this palette against the Kraft color. I used the following color #'s: 117, 118, 217, 170, 168, 173, 145, 110, 246, 113, 109, 108, 119, 134, 133, 129, 128, 125 and white. Once I was done with the coloring I fussy cut the image.
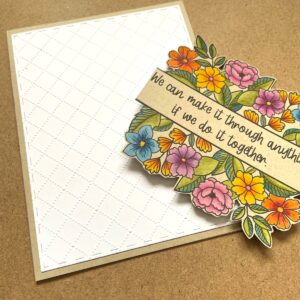
I adhered the embossed panel to my card base and with liquid glue I adhered my colored image to the card. I liked how the colors of the design played off the white. For a tiny bit of embellishment I added some white gel pen dots to the centers of the flowers and I colored some of the dots on the embossed piece with a Copic Marker #Y28. And that finished my project for today!
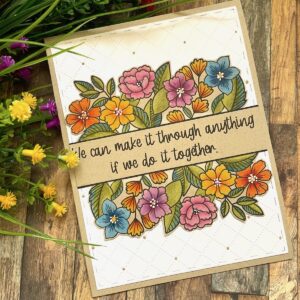
This was a beautiful set to create with and has lots of possibilities. All of the sets in the new release - Springish Fiesta are now ready for purchase. Grab yours and start creating!!!
Thanks so much for stopping by today. We hope this new release inspires you!
Betsy
In my capacity as a design team member for Joy Clair Designs, I do receive the products I use from them.
All opinions and creative decisions remain my own, and I only work with companies/use products that I love.
Friday, February 11, 2022
Springish Fiesta Release & Blog Hop with Joy Clair Designs


Hello everyone! Spring is coming and I hope you are ready for our
Joy Clair Designs Blog Hop
ft.
Springlish Fiesta
The team has been busy creating inspiration for the newest release
Springlish Fiesta. There are some gorgeous digital stamp sets in this
release! All details are at the end of this post. Today I'll be providing inspiration
from the "You Are Loved" digital stamp set. Let me show you how I
made my mini slimline card!

I started out by composing my image and sentiment in the computer.
Sometimes while doing this I may print it out several times on copy
paper just to make sure I have the sizing right. In this case, I changed
the color of the main image from black to gray. I wanted a softer
look for my card today.

I started out color matching with a totally different background paper in mind. I changed
my mind once I got going, but the overall softness of the Copic colors didn't change.

Sometimes I find if I've chosen colors that are too dull or soft, I glaze
them with a brighter color. Because Copics are transparent, this really
works well to bring brightness to an otherwise dull area.

I was pleased with the tone I achieved for these flowers.
Next, I moved on to the leaves and stems. Because I changed
the color of the image to gray, I could color over the solid stems
and it would just be a darker shade of green.
Copic colors used:
Y11, Y21, YR21, YR24
Y15, E97, YR18, YR04
G82, YG63, G85
I die cut my sentiment with a stitched banner die and used my
Copic marker C0 to color it. There is a very pale gray in the
paper, so this really looks harmonious. I fussy cut my floral image.
I cut my mini slimline card base so the folded card measures 3" x 6 1/4".
I cut my patterned background paper 1/16" smaller.

I adhered my floral piece flat to the background centered and more
to the left. I adhered my sentiment with foam tape and cut it off flush
on the left side. I added 3 sparkling gems that had a yellow tint
around the base of the flowers. And that finished my card!

The team has come up with some amazing cards using the Springlish Fiesta
Release. For a chance to win - comment on our blogs!
Hope to see you all there!

BLOG HOP DETAILS
All you have to do is hop along to each stop & leave a comment along the way to be entered to win! Winners will be posted here on Joy Clair Designs Blog by business end on February 22. You must check this blog & claim your prize within one week.
PRIZES:
Grand Prizes: One comment from this blog post will win the "Springish Fiesta Bundle 2022" with entire release. Three comments from all designer's blog hop post will win two digital stamp sets each one from our New Release "Springish Fiesta 2022".
Here is a list of all of the stops:
Joy Clair Designs - https://joyclairdesigns.com/?
Colleen Balija - https://irishrosecreations.
Crystal Komara - https://www.crystalkomara.com/
Nonni Niskanen – https://nonnishandmadecards.
Joy Wilson – https://joywilsonink.com/?p=
Rebecca Rapanaro – https://www.wizardessofcards.
Martha Lucia Gomez – https://stampartpapel.com/?p=
Esther Asbury – https://www.
Anila Dikay – https://novelideas-gifts.
Priscilla Joseph – http://nubblelightdesigns.com/
Jyoti Adhikari – https://www.cardsncraftsnyc.
Betsy Birge – https://caringheartcards.
Maureen & Michele – https://kreativekinship.com/
Marj Banzales – https://marjbanzalesdesigns.
Bonnie Crane – https://www.bonniecarollee.
Jamie Martin – https://stampthis.blogspot.
Hannelie Berter – https://desertdiva-hannelie.
Susan Powell – https://creatingwithsusan.
Sandhya Lyer - https://sanjuscreations.com/
Here is a listing of the full release:
- Always in Style - https://www.joyclair.com/
products/always-in-style- digital-stamps - Count Me In - https://www.joyclair.com/
products/count-me-in-digital- stamps - Good Luck - https://www.joyclair.com/
products/good-luck-digital- stamps - Refresh the Soul - https://www.joyclair.com/
products/refresh-the-soul- digital-stamps - Sweet Friends - https://www.joyclair.com/
products/sweet-friends- digital-stamps - Truly Inspire - https://www.joyclair.com/
products/truly-inspire- digital-stamps - You Are Loved - https://www.joyclair.com/
products/you-are-loved- digital-stamps - Springish Fiesta Bundle - https://www.joyclair.com/
products/springish-fiesta- 2022-bundle
Thanks so much for letting me inspire you today! Please join us for a chance to win
this amazing release!
Betsy
In my capacity as a design team member for Joy Clair Designs, I do receive the products I use from them.
All opinions and creative decisions remain my own, and I only work with companies/use products that I love.
Tuesday, February 8, 2022
Spring Chicken with Brutus Monroe

Hello everyone! Today I'm sharing the newest cutting die
set from
How fun is the new Spring Chicken Cutting Die Set! I just fell in
love with this rooster!!!! I mean, come on - who doesn't need a
hug from a rooster!!!!! 😆
Let me show you how I made my card!
First, I Google imaged roosters. I had a particular color way in my head,
but wasn't quite sure how far to go with my colors. I did find a really
good image with the colors I had envisioned. I laid out about 10
colors of Chroma Mists. I used Candy Apple Red, Yellow Orange,
Bumblebee Yellow, Blue Violet, Noble Fir, Leaf Green, Seaweed from
the Mermaid Mist Collection and Ornament Gold for shimmer. I cut
up a piece of cold pressed watercolor paper (90 lb) and smooshed the
Chroma Mists on.

I started die cutting all of my pretty papers. I used the brownish/red for his
head, the teal for his tail, the red for the comb and waddle and the orange/yellow
for his beak and feet.

I die cut the main body from black card stock and painted on a coat
of the Seaweed Chroma Mist to give the piece an overall shimmer and subtle color.
I pieced together my rooster...adding a bit of extra shimmer where I needed it
with a shimmer pen. I prepared my flat shaker base by taking a piece
of barn board paper in teal and cutting it to 4 1/4" x 5 1/2". I used a
piece of acetate from some packaging and made a flat shaker. I made my
sentiment by using a piece of smooshed yellow/orange paper for the
actual letters and the shadow from black card stock with the Seaweed
Mermaid Mist on it.

I adhered the base to a top folding A2 size card base in Warm Sunset card
stock and then adhered my rooster and sentiment to the front of the card.
I added Glossy Accents to the eyes and beak and my card was finished!

I love this rooster so much! I like the little chicks as well! You can
find the products I used in my project at
Thanks so much for stopping by today! I appreciate your time and I
hope I've inspired you!
Betsy
In my capacity as a design team member for Brutus Monroe, I do receive the products I use from them.
All opinions and creative decisions remain my own, and I only work with companies/use products that I love.
Monday, February 7, 2022

Hello everyone! Today I'm featuring a card made a digital stamp set from
This stamp set is truly versatile and so very pretty! Let me show you how I made my card. I started by composing my butterflies and sentiment in the computer and printing it out onto some pink patterned card stock from my stash.
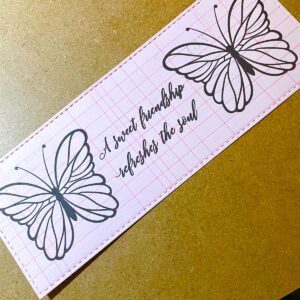
I found this paper very inspiring. It's a beautiful shade of pink with some text/numbers ghosted in gray. I die cut my panel using a stitched die before coloring. I used a scrap of the left over paper to try some different color combinations with my Copics. I finally settled on a pink one.
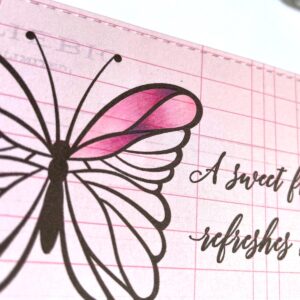
I chose 3 sections on each wing to reverse my shading. So most of the sections had the shading on the inside end, the 3 sections I chose had it on the outer end. I like the way that made them stand out.
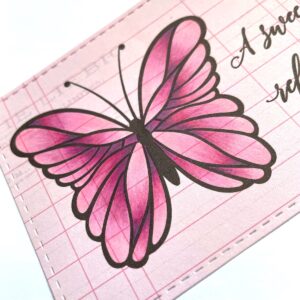
The end result of the reverse shading really made the wings pop. I went on to color the other butterfly. Copic colors used: RV21, RV63, RV34, RV66, C5. Once all the coloring was done, I made a slimline card base from some light gray card stock. The card when closed measures 3 1/2" x 5 1/2". I added a panel of silver glitter paper to the gray panel that was 1/8" smaller. To that I added a black card stock panel that was 1/8" smaller than the glitter paper.
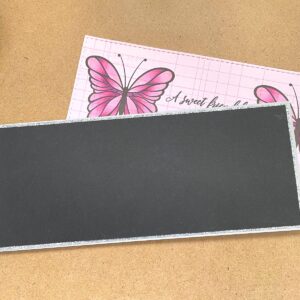
Before adhering my pink panel to the card, I stamped a post mark stamp on the lower right corner in pale gray ink. This is very subtle but adds to the harmony of the card. I adhered my butterfly panel to the card base.
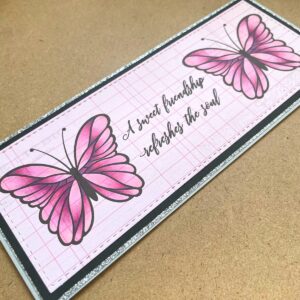
I felt the card needed a bit of sparkle. I had some mirror baubles in different sizes and I had a mirror heart that matched. A touch of shimmer pen to the 3 sections on each wing that I reversed the shading and my butterfly card was done!
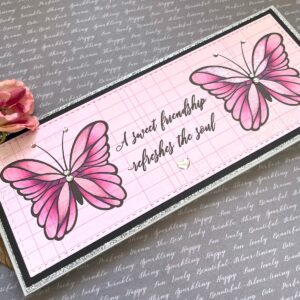
I love how this card came out! I think the butterflies are gorgeous and they will be a staple in my digital stamp collection! You can find this set at
Joy Clair Designs
Thanks so much for stopping by and sharing your time!
Betsy
In my capacity as a design team member for Joy Clair Designs, I do receive the products I use from them.
All opinions and creative decisions remain my own, and I only work with companies/use products that I love.
Tuesday, February 1, 2022
Antique Trellis with Brutus Monroe

Hello everyone! I hope everyone is safe and doing well! January is
over - YAY! Closer to spring and warmer weather! Today I'm sharing
a project made with some fun new products from
Brutus Monroe
This mini slimline is deceptively simple but so full of sparkle and
shine! Let me show you how I made my card!
First - I was able to use the new Stick & Stamp Mat! This is an
absolute game changer! It measures 6 1/2" x 8 1/2" and has a
tacky surface that can be used over and over. And, because of the
convenient size - it fits into an Original MISTI! Clean up is a
dream with Squeaky Clean Mat Mist. I placed my stencil on
top of my card stock that was placed onto the Stick & Stamp Mat.

Because of the generous proportions of the mat, it allows all of the
edges of the stencil to stick to it. So convenient. Using a palette knife
I applied the Teal Candy Coat on top of the stencil. The stencil comes
right off and by bending the mat, my card stock piece also came off.

Like many other Brutus Monroe mediums, Candy Coat when applied is
quite opaque. The magic happens when it dries! The base has fine
sparkle in it and there are pieces of iridescent flakes. When it dries this
has so much sparkle and shimmer. While that was off to the side drying,
I heat embossed my sentiment using the Simple Strips - Crafty using
Alabaster Embossing Powder and the coordinating die.

Next I made my mini slimline card base out of white card stock and
covered it with turquoise Glitterstock. I added to that a black panel.
I cut down my dry stenciled panel.

After adhering the stenciled piece I popped up the sentiment on foam tape
and adhered to the middle of the card. I tied a triple bow of turquoise silk ribbon
and adhered it to theft of the sentiment. I took a Q-tip and went around the
edges of the ribbon with Alabaster Glitter Glaze. And as a final bit of
shimmer I added a few pieces of iridescent confetti. And that finished
my card!

I love working with extra sparkle this time of year because it's so
drab. This new Candy Coat is over the top with sparkle! Expect to
see more colors of this as 2022 progresses!!! 💫. You can find
the products I used at
Brutus Monroe
The new Stick & Stamp Mat is at a great price point! The stencil is
available through a subscription program as well as being able to
just purchase it.
Thanks so much for stopping by!
Betsy
In my capacity as a design team member for Brutus Monroe, I do receive the products I use from them.
All opinions and creative decisions remain my own, and I only work with companies/use products that I love.
Subscribe to:
Posts (Atom)

-
 Hello everyone! I am so excited to be a part of the February Release Blog Hop and Giveaway at Joy Clair Designs! You can hop along with u...
 -
Hello everyone! Spring is coming and I hope you are ready for our Joy Clair Designs Blog Hop ft. Springlish Fiesta You Are Loved The team ...

