
Hello everyone! Spring is right around the corner and today I'm sharing
this adorable spring themed mini slimline featuring products from
This stamp set is so adorable! It features 35 stamps and there are 32 matching
dies! Let me show you how I made my card. I first made a mini slimline
card base from white card stock. I make mine 3" x 6 1/4". I laid it flat
and taped off the back edge with mint tape. I then ink blended Simon Hurley
Ink Break Up Blue on the upper third of the card base.

I set that off to the side and using my MISTI I stamped all of my elements
with Raven Detail Ink.

Using Key Lime card stock - which is my favorite spring green - I die
cut layers for the grass using a wavy grass die. I die cut my elements
at this point.

I felt the grass pieces could use some variation in color so using more ink
from Simon Hurley I did the tips of the grass in Shooting Star and the
main part of the grass with Later Gator. I was not fussy about really
blending the colors - you can see it's quite blotchy but it smooths out
as it dries.

Now it was time to use the Aqua Pigments to give my elements color.
I used Red, Yellow Orange, Green and Tinsel Blue. I mixed colors to
get a brown for the animals, a purple for the flowers and butterfly and
a true orange for the center of the daffodil and a yellow green for the leaves.
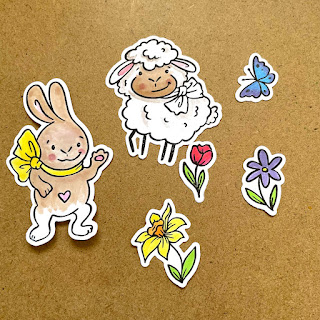
I knew I was going to be tucking in the animals so I did not bother to
paint the whole rabbit. I did end up cutting off the bottom of him. I
did, at this point, I forget to paint the bow on the sheep, but I did catch
it and painted it purple. Next I needed to adhered my grass layers
to my base. I was placing my elements in temporarily so I could see
where I would put my sentiment.

I used Raven Sparkle Embossing Powder for the sentiment. Now it
was time to adhere all of my elements. I first tucked in the animals,
trimming off the bottom of them as needed. When I adhered the grass
pieces I only put glue on the bottoms of those pieces so I could freely
tuck in my elements. I applied liquid glue to the base of the elements
and used foam tape on the upper portions. Once those were in place
I added sequins - most of which came from the current Inspiration Box.
As a last bit of embellishment, I used a shimmer pen for the flowers,
the bows and the butterfly. I also added dots of gold with a metallic pen
to the wings of the butterfly. And that finished my card.

I hope you enjoyed today's tutorial. This is such a fun set and really the
possibilities are endless with so many elements to chose from! Find the
products I used at
Thank you so much for spending time here today! I hope I have inspired
you to create something!
Betsy
In my capacity as a design team member for Brutus Monroe, I do receive the products I use from them.
All opinions and creative decisions remain my own, and I only work with companies/use products that I love.


No comments:
Post a Comment