Hello everyone! Today I'm sharing this sweet little Princess card
using subscription products from
I absolutely love the Glitter Glaze of the Month. It's Bunny Nose!
I knew it was going to be perfect with the Stamp of the Month.
Let me show you how I made my card.
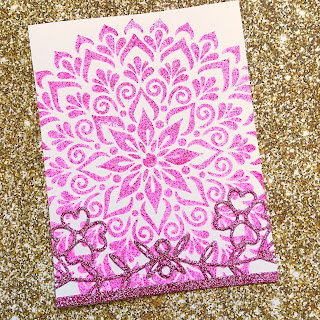
I started by cutting a 4 1/4" x 5 1/2" panel of heavy white card stock
and stenciling on the Glitter Glaze of the Month. Then I set that aside
to dry.
Next I stamped my princess image using Raven Detail ink and my
MISTI to assure that I got a good impression.
I decided to color the image with Copic markers.
Copic markers used:
Dress, Cheeks and Sentiment Strip: RV000, RV00
RV02, RV10, RV63
Hair & Skin: E50, E53, E21, E31, E33, E35
Eyes: BV000, BV02, BV13
Crown: Y02, Y15, Y28
I fussy the image out when I had completed my coloring. I used
a banner die for the sentiment that was stamped with the Simple Strips-
Crafty.
I chose the smaller piece from the Die of the Month and die cut
it using pink Glitterstock. I trimmed up my stenciled piece to
4" x 5 1/4" and placed this die cut piece across the bottom.
I adhered this panel to a pink A2 size top folding card base. I saved
the evacuated pieces from the die cut - which are little hearts! I
adhered my princess, the hearts and the sentiment and popped all of
them up on foam tape for dimension. I added shimmer with a shimmer
pen to parts of her dress, bits of her hair, the colored parts of her eyes and
the sentiment strip. I added 3 tiny gem stones on the crown and
Crystal Glaze to her eyes and my Princess card was finished!
I hope you've enjoyed today's tutorial and are inspired to make
a sparkly princess card, too! I've included a SNEEK PEEK on
this post. Did you catch it? 😉
Find all of these great products at:
Thank you so much for spending time with me today!
Betsy
In my capacity as a design team member for Brutus Monroe, I do receive the products I use from them.
All opinions and creative decisions remain my own, and I only work with companies/use products that I love.


No comments:
Post a Comment