Friday, March 31, 2023

More Aussie Animals with Kate Hadfield Designs


Hello everyone!  Still cold where I live but I did see a robin a few days
ago - a sure sign of spring!  Today I'm bringing you another fun card project
using images from


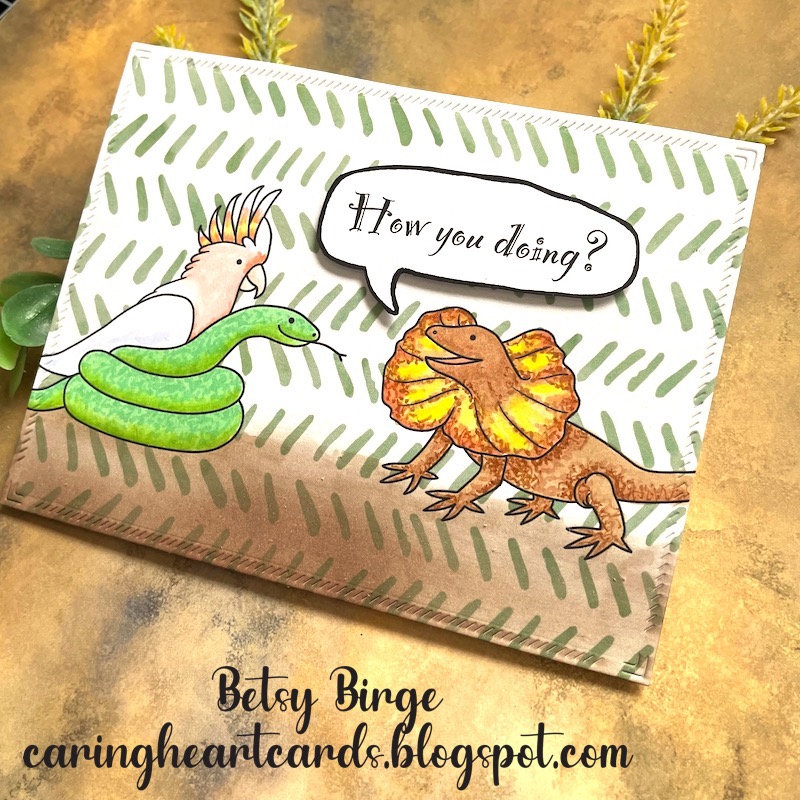
The animals in this set are so cute!  There's no better way to check up on a
friend, then sending this card with all the friendly critters!  Let me show you
how I made my card.  I first composed the card design in my computer.  In
this case I also used digital paper from my digital stash!  Because these are
.png files, they layer over top of the digital paper!


I also printed out the sentiment on this sheet as well.


Before coloring the animals, I decided to die cut my panel first.  This
gives me a better visual view as I am coloring.  I used a slanted stitch
die from LDRS in an A2 size - 4 1/4" x 5 1/2".


I used my Copic markers to color this up.  For colors I used:
R00, E41, R02, W1, W0, Y02, B60, YG41, YG03, G02,
Y02, Y06, E31, E33, E35, E40 and E43.


I usually go to Google Images to sort of get an idea of how things and
animals are colored.


I wanted these little animals to really pop so I used bright colors.


I did some stippling on the lizard and the snake just to give them a
bit of depth and interest with visual texture.


My only bit of embellishment was using a gold shimmer pen on the collar
of the lizard and across the top of the snake and the head of the bird.
I cut out the sentiment in the shape of a speech bubble, used a black
water-based marker around the edges and foam taped it over the lizard. Then
I blended some brown ink along the bottom of the card so the animals
were grounded.
And that finished my card!


I'm just loving creating with these animals!  You can find this set and many
more digital stamps sets at


Thanks so much for stopping by!

Betsy

In my capacity as a design team member for Kate Hadfield Designs, I do receive the products I use from them. 

All opinions and creative decisions remain my own, and I only work with companies/use products that I love.




Tuesday, February 14, 2023


Hello everyone!  Still pretty cold where I live!  Hope everyone is doing well and
staying healthy!  Today I'm bringing you a winter card using products from


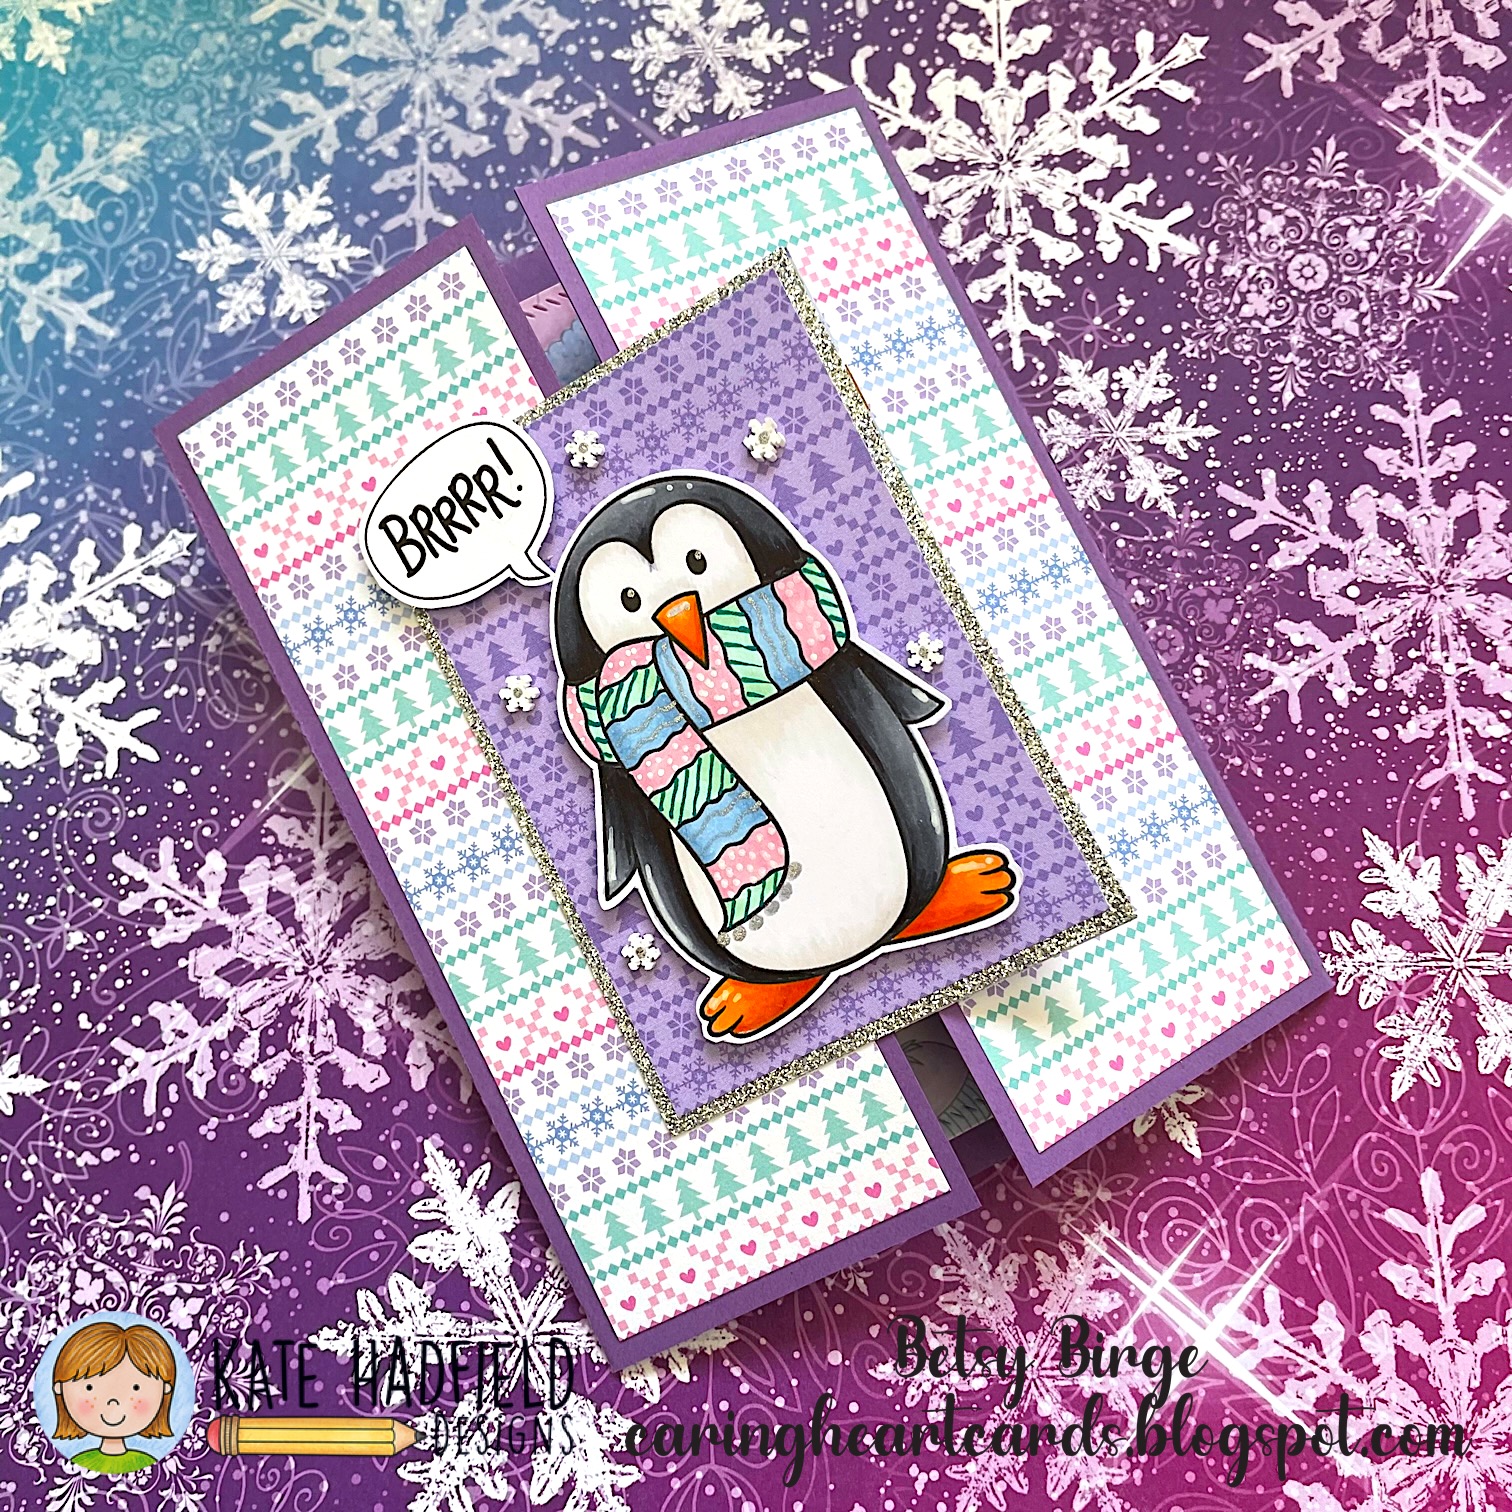
This little penguin from the Bundled Up Set is too cute!  This set has 19 images
included - 19!  Digital stamps are so economical!  Let me show you how I made
my project today.  I started out by composing my elements in my computer.
I use Word for a program and I have a MacBook Pro.  My printer is an inkjet.
I sized the penguin first and then I made a collage of one of the hats, a mitten
and snowflakes sprinkles throughout.  Word allows me to change the color
of a photo, so I changed it to be a light gray.  I wanted to use this as the
inside of my gatefold card.


I cut down my image of the penguin which I would fussy cut after it was
colored.  I used a 3 3/4" x 5" slanted stitch rectangle die for the collage.  I
had planned on doing this as a gatefold and it was important at this point to
choose my papers so I could color the images.  I settled on this cute winter
stripe paper with a medium purple card stock base.


For the coloring of my images I used my Copic markers.  For colors
I used: C2, C3, C5, C7, 100, W0, YR02, YR04, YR07, E08, B41, B34.
G00, G12, R81, R83, BV00.  I used the lightest of these colors to 
color the collage panel as this will be the area to write to the recipient.
I didn't shade these areas...just straight coloring.  On the cuff of the
mittens I just did little squiggles with the B41 marker.  I used a white
Posca Pen for highlights on the penguin.  I used a silver sparkle pen
for the penguins eyes and for patterns on the scarf.


To make the base of the card I used a 8 1/2" x 5 1/2" piece of 
purple card stock.  This wasn't a whole sheet to start with so I didn't
have any left over.  On the short sides I scored 2 1/8" in and then
folded them to the middle of the card.  I adhered my collage panel to this.


For my little penguin piece on the front I used a purple paper that had
the same pattern on it as the background paper.  I was going to back that
with more of the purple card stock but this was the point I discovered I
didn't have any left!  😱  I decided to use silver glitter paper and I love it!
Sometimes situation like this works out for the better.  The silver
glitter paper really makes the pen work on the scarf stand out.  I printed
a sentiment from the Let It Snow Stamp Set.


I didn't do anything to this except fussy cut around it.  My panel with the
penguin, including the sliver glitter backing is 3 1/2" x 2 1/2".  I adhered
the penguin with foam tape and the sentiment as well.  I positioned the
sentiment to the upper left of this panel and let it go off the edge.  I
adhered the panel on the left side only of the card base, centering it.  the
back of the glitter paper was showing when I opened the card so I covered
it with more of the purple patterned paper.


I added a few clay snowflakes and used the silver glitter pen to put a
dot in the middles and that finished my card!


This card was fun to make with a few challenges along the way!  I love
working with colors and patterns and this project hit all the right buttons!
Find the stamp sets I used and many more at


Thanks so much for stopping by!  I hope I've inspired you today!

Betsy

In my capacity as a design team member for Kate Hadfield Designs, I do receive the products I use from them.

 All opinions and creative decisions remain my own, and I only work with companies/use products that I love.


Tuesday, December 20, 2022

Welcome Winter with Brutus Monroe


Hello everyone!  Winter is settling in and we are nearing the longest day
of winter.  YAY!  It only gets lighter from there!  👍. Today I'll be sharing
a winter project with products from


What a fun project this was!  Lots of die cutting to make this winter
vignette.  Let me show you how I made my card.
I started by taking a piece of light blue card stock.  I used one half for the
base of my card and the other half I stenciled using the Subtle Spots
Stencil with Alabaster Glitter Glaze.  While the Glitter Glaze was still
wet I added Snowflake Shaker Fill.  


I set that off to the side to dry.  I then die cut my pieces for the bird.  I really
wanted to make a Bluejay for this card.  I used a blue that was darker than the
base of my card and I die cut the underneath black layer. 


I wanted to do someheat embossing on the blue layer.  I used an
 embossing pen for this.


I didn't get it solid white and I was ok with this, knowing that by
having missed some places would give this texture.  I was using a
photo reference from Googles Images.  I next heat embossed my black
layer using the same method.


I know it looks a bit weird around the eye, but with a black Copic marker
and a black gem for the eye, it came out great!


I was ok with the final result.  I took a blue and black Copic marker and
made feathers on my Blue Jay.


I was pleased with the final result.  Even though he looks a bit rough, it
does all come together in the end!  Next I die cut the branches, snow,
spruce boughs, pine cones and sentiment.  I put Fallen Snow Glitter Glaze
 on the pine cones.  


I adhered everything onto my card that had the stenciled panel glued
to it flat.  After all was on I added more Fallen Snow Glitter Glaze to
the spruce boughs and pine cones.  I added some antique gold gems
and felt they really enhanced the pine cones.  And that finished my card!


I hope you enjoyed today's tutorial!  I really enjoyed making something
more unexpected with this die set!  You can find the products I used at


Thanks so much for stopping by!

Betsy

In my capacity as a design team member for Brutus Monroe, I do receive the products I use from them. 

All opinions and creative decisions remain my own, and I only work with companies/use products that I love.