
Hello everyone! Spring is on it's way and today I'm sharing a project
made with products from
This stamp set is part of the Spring 2022 Release and is so adorable! Cute
little bugs with lots of little bits and sentiments - 40 pieces in all! And, of
course there are matching dies available. Let me show you how I made my
card today! I really needed to do planning to get my shaker heart balloon card
to come out right! After determining where I wanted my stamping I used
black ink to stamp my ladybug and sentiment after die cutting my 3 heart windows
onto Whitewash card stock.

So there's not much coloring on the ladybug. Using Candy Apple Red Chroma
Mist with a touch of Yellow Orange & Ornament Gold, I painted her wings. I was
unsure of the color of her face. I tried the red...she looked like a devil! 😮. Then
I tried a gray water base pen over the red thinking it would tone it way down. It
turned her face a dark purple and she looked like she was about to explode! So
I stamped out her head and wings again onto Whitewash card stock and colored her
face just plain gray. I had also used the same gray marker to color the lines on her tummy.

This worked out so much better. And gave the card a bit more dimension
by fussy cutting out the wings and headband popping them up on foam tape.

For her underwings I mixed Cobalt Blue and White Choma Mists together
and put a light coat on them. Next I made an A2 size top folding card base
from Whitewash card stock and adhered a red panel to it that was 1/8"
smaller.
I moved on to make the shaker. I was using the sequins from the
kit and some of them were quite large so I knew that given how small my
hearts were there wasn't going to be lots of shaking. I was ok with that as
my main goal was to just have the sparkle and a little shaking of the
sequins. I wasn't shy with the foam tape on the back of the card. I really
wanted them secure and wanted all three sequin colors showing.
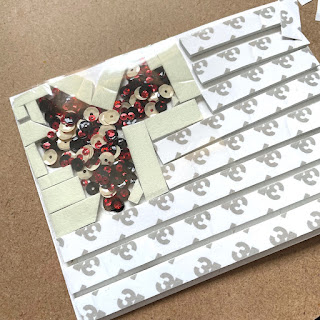
I got to this point and placed another piece of acetate on the back to cover the
sequins. I added extra liquid adhesive on those parts before gluing this panel
to the main card panel. For embellishments I used a bit of red ribbon from the
kit, just tied a knot and placed in the lower right corner. I used 3 clear red
hearts and with a fine tipped pen I made stitching lines and balloon strings. I
also used more shimmer on the wings and made cheeks with a Copic marker.
And that finished my cute ladybug card!

I hope you enjoyed today's tutorial. Several twists and turns but I love
the end result! You can find the products I used at
Thanks so much for being here today! I hope I've inspired you to
make something fun and colorful!
Betsy
In my capacity as a design team member for Brutus Monroe, I do receive the products I use from them.
All opinions and creative decisions remain my own, and I only work with companies/use products that I love.


No comments:
Post a Comment