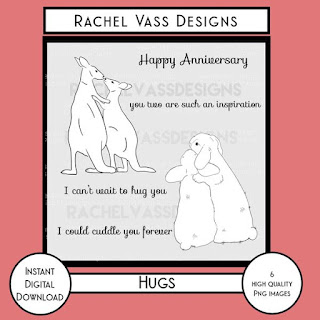
Hello everyone! Today I get to share one of the stamp sets from
the New Release:
What a sweet set this is! Bunnies are my favorite so I decided to use
the hugging bunnies image. I first chose my paper. I am using a piece
of patterned paper from Lavinia called Scene Scapes. Mine was
from the Sacred Collection. I sized and then printed my bunny image
onto Neenah 80lb Classic Crest Solar White card stock.
I colored my bunnies with Copic markers.
I colored them in a way to show that they were back lit.
Copic colors used:
Bunnies: Y02, E21, E35, E37, E49
Shadow: BV29
Moon: Y00
After the coloring was finished I fussy cut the image. Then,
using a black water-based marker, I went around the edge.
I cut my background paper using a die and placing it on the
paper where the moon was in the middle and the ground made
sense. I set the bunny image on it and marked where the
bottom of them would be and then using my BV29 made a
shadow on the ground. I didn't get too fussy with this. It's
just to give an illusion of depth and perspective.
I adhered this background paper to a top folding A2 size white
card base. I adhered the bunny image flat onto my card. For
a little added shimmer I adhered tiny yellow iridescent stars on
the moon. I had colored the moon with the Y00 because it
was stark white and I felt it needed to be toned down a bit. The
stars were a nice little embellishment pop.
I hope you enjoyed today's tutorial. I love a background paper that
virtually does the work for you! This line of Lavinia paper is
beautiful!...so many options! I didn't feel my little bunnies needed
a sentiment. I love it just the way it is!
You can find this digistamp set and the rest of the new release at:
Rachel Vass Designs
There are many beautiful designs!
Thanks so much for stopping by today!
Betsy
In my capacity as a design team member for Rachel Vass Designs, I do receive the products I use from them.
All opinions and creative decisions remain my own, and I only work with companies/use products that I love.


No comments:
Post a Comment