Hello everyone! Today I'm sharing this super textured card
using products from:
Let me share with you how I made my card. I started out with the SVG cutting file
that I loaded into my Brother Scan 'n Cut. I used the Elegant Essentials in Rose
for this. I had to size the design a bit smaller, as the original size of this file was
too big to fit onto an A2 size card.
Next I die cut my sentiment from Glitterstock in Copper. I die cut the
thin sentiment from the Copper and the shadow in white glitter card stock.
I adhered the copper layer to the white layer with liquid glue. I made a card
base from Whitewash card stock. This was A2 size top folding. I adhered a
full piece of the copper Glitterstock to this. I knew I didn't want just the
Glitterstock as my background behind the heart shapes. I had a package
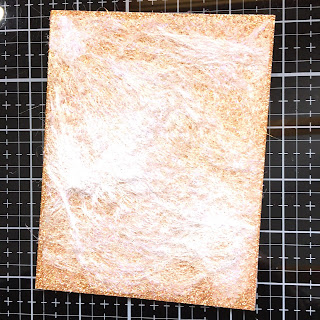
of Fabulous Fiber. I have to admit...I've had it for a while and never used it.
I really wasn't sure how to use it, so on the website it said you can use your
heat tool with it. So that's what I did. On my silicone mat I laid pieces of
the fiber across the back of Whitewash card base. When I had it fairly covered,
I used my heat tool and it melted together. It melts quickly! I kept adding more
fibers until I was happy with the density of the piece. Once it is melted you
can pick it up as it forms a delicate sheet!
The side that it was melted on was a bit hard...it lost that very fibrous
look. But I flipped it over and it was still soft and ethereal looking!
After trimming this panel so it would fit onto my card base, I adhered it to
my base using a white liquid glue that dries clear.
I placed my heart panel over this and adhered it with the same white liquid
glue. I adhered my sentiment at an angle over top of the heart panel. I had
a number of hearts left over from the die cut panel. I stacked 3 of them together
and then adhered one I had made out of a scrap of the Glitterstock (by tracing
one of the hearts that came out of the panel) and adhered it on top. Then I
adhered to the bottom right heart shape on the card. Because it's 4 hearts,
it's raised up slightly from the rest of the card. I used 3 more of the left over
hearts as an embellishment inside my card!
This was so much fun to create! I love using products that are very new to
me and discovering their uses! You can find these products at:
I hope you've enjoyed this tutorial and I've inspired you to create!
Thank you so much for stopping by!
Betsy
In my capacity as a design team member for Brutus Monroe, I do receive the products I use from them.
All opinions and creative decisions remain my own, and I only work with companies/use products that I love.


No comments:
Post a Comment