Hello everyone! Hope everyone is well and crafting like crazy!!!!!
I love paper engineered projects and this one is so cute! And I couldn't have made
it without using the Best Glue Ever with the No-Clog Writing Tip.
I downloaded the free template from EssyJae.com. There is also an
SVG file available for purchase.
So to begin, I printed the template out on the pattern paper I was using. Make
sure to print this template on the back side of the paper so that any black lines
will show on the inside of the cup not the outside.
This is the cup and handle. You will need a letter size piece of paper (8 1/2" x 11").
It will not fit on a 6" x 6" piece. I trimmed down a piece of 12" x 12" piece.
I then cut out the pieces. The dark lines that are still showing need to be scored
and folded. I used my scoreboard, but if I was to make this again I would score the
lines with a stylus and ruler. The scoreboard made lines that were a little too wide.
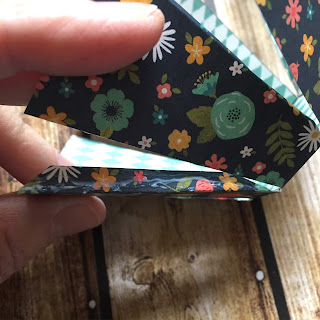
Next it was time to glue the cup together. I used the Best Glue Ever with the
No-Clog Writing Cap. Just a little of this glue is enough.
After all of the tabs are glued your cup should look like this:
The next step is the handle. Start with a little glue at one end of the handle piece and
adhere it to one of the flat panels towards the base.
Next I placed a drop of the Best Glue Ever on the front part of the strip at the top. Then
I curved it around and adhered it near the top of the cup to form the handle.
There is a template for the saucer but I chose to use a scalloped stitched circle die
instead. I did this out of a coordinating piece of solid card stock.
I added drops of the Best Glue Ever to the bottom of my teacup and adhered it to
the center of this base. I trimmed my teacup and handle with gold peel-offs.
There is also a "teabag" template included. I cut mine out of white card stock,
stamped a simple message, added one strip of peel-offs and an enamel heart.
I punched a hole in the top and added baker's twine and glued the twine inside the
cup so the tag hung on the outside. I stuffed the teacup first with a crumpled up tissue
to take up space and then put some sparkly fiber on top.
And that finished my teacup!
I think there are so many uses for these! As favors for a baby shower, wedding
shower, as part of a centerpiece for an anniversary, to take to a sick friend. And
anything could be added inside. Actual teabags, candy, little trinkets.
I hoped you enjoyed today's tutorial! It's not difficult and it's so cute!
ScraPerfect Products Used:
Best Glue Ever
No-Clog Writing Tip
Other Products Used:
Echo Park Paper: The Story of Our Family
Love From Lizi Gold Peel-offs
Gina K Designs Card Stock Ocean Mist
Gina K Designs Hugs Stamp Set
Doodle Bug Enamel Heart
Trinity Stamps Sparkly Fiber
Thank you so much for stopping by today!
I really appreciate your time and support!
Betsy
In my capacity as a design team member for SraPerfect, I do receive the products I use from them.
All opinions and creative decisions remain my own, and I only work with companies/use products that I love.


No comments:
Post a Comment