Hello everyone! I am writing this after a long weekend off from work! How
lovely to have the time to create! Today I'll be using products from
I wanted to really think outside the box on this project. I did this by taking a
themed stamp set - fall - and making it into a not-so-fall card! Let me show you
what I did!
I first took a piece of heavyweight white card stock and the Basket Weave Stencil
and used Chroma Mists. I used Lilac and Candy Apple Red Chroma mists watered
down with water that had mica powder in it. I used a stencil brush to apply the Mists.
While I was waiting for that to dry, I stamped and heat embossed in black my
5 flowers. I stamped 3 of the pansies and 2 of the mums.
I painted these flowers with the same mix of Chroma Mists. I watered some
of it down with the water/mica powder. To get darker areas, I waited until the
first coats were almost dry and then went in and added more. As long as
you wait for the layers to dry, you can keep adding color to get darker shades.
Once these were dry I added the black beard part with my black Copic marker and then
added a small yellow part in the center with a Yellow Posca Pen. Then I die cut them with
the coordinating dies.
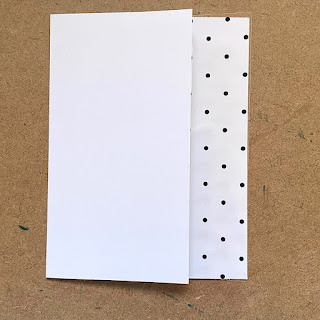
I next cut an A2 size side folding white card base. I folded it and then cut
off 1 1/4" on the right front.
I then cut a piece of black dotted acetate from my stash that I adhered to the back
of the front panel and just the 1 1/4" of it shows on the front of the card.
I cut down the stenciled panel to fit on the front white card stock piece.
It measures 2 3/4" x 5 1/4".
You can see some weird markings on the right side of this panel. I was going to
go in a completely different direction, but it didn't work out. However, I knew these
markings would be covered up by my flowers. I adhered this panel to the front of the card.
Time to adhere my flowers! I adhered one pansy at the top and one at the bottom
flat to the card and straddling the space between the card stock and acetate. Next
I added the mums. I popped those up on foam tape. I placed one facing one way
and the other facing the opposite. And lastly I added my last pansy to the middle
also on foam tape. I added some mirror confetti and my project was done!
This card was fun to make! I stepped out of my comfort zone to do the
acetate on the front, but I love the effect. I might have to send this card
to my bestie! I hope you enjoyed today's tutorial. You can find the
products I used at
Thank you so much for being here and taking an interest!
Betsy
In my capacity as a design team member for Brutus Monroe, I do receive the products I use from them.
All opinions and creative decisions remain my own, and I only work with companies/use products that I love.


No comments:
Post a Comment