Hello everyone! Today's card features:
Wow! This stencil is gorgeous! It's so detailed and produces such a crisp image! It gave me the feeling of windy leaves. But it could be other things as well!
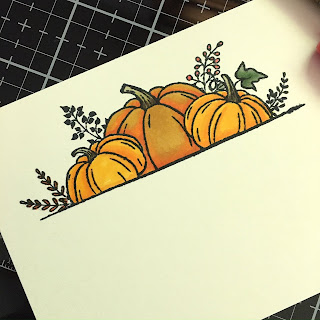
First I chose my papers and cut them all down to the sizes I needed them to be.I also stamped my image with Raven Detail Ink onto Neenah 80lb. Cream ClassicCrest card stock. The stamp comes from the Autumn Essentials Stamp Set.
I put my base together first. The yellow card stock was cut to make an A2 size top
folding card base. I added a layer of very dark brown card stock 1/8" smaller. The
patterned card stock measures 4" x 5 1/2" and is from the Autumn Foliage Paper pad.
Then I cut a piece of the Cream card stock to use my stencil on.
For the stenciling I used a Pink & Main Ergonomic Blending Brush and some
Distress Oxide Ink in Speckled Egg. I ended up cutting down this panel from
what it originally was. The final measurement was 2 1/2" x 3 3/4". I backed
this on a piece of the dark brown card stock as well with about 1/8"
showing on all sides.
Next I colored my image with Copic markers.
Copic colors used:
Stemsand Leaves: BG93, YG95, YG67, BG96, E49, YG91
Berries: R14
Small Pumpkins: Y17, YR15, YR16
Large Pumpkin: YR23, YR07, YR04
After the coloring was completed I fussy cut the image.
Before adhering the stenciled panel to my card, I stamped a sentiment on
it from the Extra Sentimental Stamp Set with a dark brown hybrid ink. I adhered the
pumpkin piece to the bottom of the stenciled panel and adhered it all to the center of
the card. As a final embellishment I added 5 small orange glitter enamel dots
and my card was finished!
can find plenty of inspiration and supplies at:
Thank you so much for stopping by today! I appreciate it!
Betsy
In my capacity as a design team member for Brutus Monroe, I do receive the products I use from them.
All opinions and creative decisions remain my own, and I only work with companies/use products that I love.


No comments:
Post a Comment