Hello Everyone!
I hope where you live you are seeing positive signs of spring! Not so where I live after 2 wild snowstorms! But, I have faith that spring will get here soon!
Today I wanted to share with you how I created this beautiful Spring Thank You card using digital stamps from Wyxzyt Digitalstamps. It's easier than you think!
The supplies I used:
- White A2 card base
- Sentiment Stamp - mine was from The Ton - Thanks a Bunch
- Roses digistamps from Wyxzyt Digistamps (Wyxzytdigistamp on Etsy) - I used all 3 different rose images
- Printer
- White cardstock
- Stamp Positioning tool
- Embossing ink
- Anti-static powder bag/tool
- Heat tool
- Gold superfine embossing powder
- Scissors
- Foam Tape/squares
- Alcohol ink colorless blender pen
- Black Brush Marker
- Glue
- 3 Shade of green cardstock - Light, medium & dark ( used patterned paper)
- Leaf dies (I used one set of mirror image leaf dies)
- Berry sprigs/branches die
- Gold mirriboard
- Sequins from Doodles Paper Playground - Spring Fling Mix
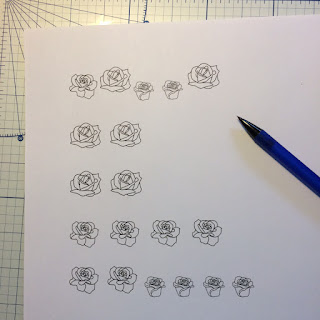
The first step is to computer print the rose images on white cardstock. I sized my images so they would be between 3/8" and 1". I repeated them so I had at least 6 of each image.
Then I colored the roses. I used the lighter colors for the outer edge of the petals and the darker ones for shading near the centers. I used a variety of color combinations: pinks/purples, yellow/orange/red, yellow/pink/red, pink/red, yellow/red. After all of the color was done I blended it with the alcohol colorless blender pen. I didn't color the images in very solid. I was more concerned that I had the color up to the edges and in the right place so there would be a nice gradation of color. I blended them going into the lightest color first and blending towards the dark color.
Next I cut the roses out right up to the black outline. These are not complicated shapes so the cutting went along quite quickly. When I was done, I ran a black brush marker along the edge.
I die-cut out all of my other bits at this point. My leaf dies are mirror images of each other and I die-cut 2 each of the 3 green papers. I also used a berry branch and pine bough die and cut those out of the gold mirri-board. Here are all of my pieces ready to assemble:
Before assembling, I stamped the sentiment onto the card, but first I traced a circle die in pencil so I would have a guide as to where to put my sentiment and also where to adhere all my bits so I would come out with a nice round wreath. I adhered the 2 darkest leaves first. Then the medium green ones were cut in half before placing them down. And the lightest/brightest ones I cut into 3rds. So when I was done gluing them down, it looked like this:
Next, I tucked in the roses, popping up the biggest ones on foam tape. The others I laid in and around always mindful of how the colors looked. I ended up using all but one of the roses I colored. Then I cut both berry branches into much smaller sections and tucked those in around as well. I topped it off with pretty sequins!
I hope you enjoyed this tutorial. There could be so many variations to this. Put your own spin on it and see what a beautiful spring wreath you can make!
In next week's post I'll be giving my review of the new Stamping' Up Stamparatus and there will be a giveaway! Don't miss out!
Have a great week!...and remember...it's only paper!
Betsy


No comments:
Post a Comment