Hello everyone! Betsy here sharing with you this wonderful and
very fun BBQ invitation using products from
I put mine on a card base, but you could just adhere a white panel
instead of a regular card! Let me show you how I made
this project!

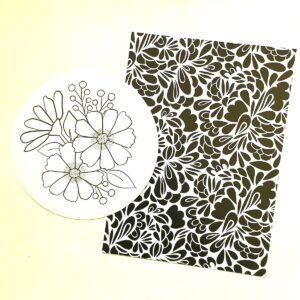
wanted to use a postage collage die and stencil for this project.
I spent a fair amount of time spent sizing my images. Some of
the elements were easy, where others, particularly the ones where I
used more than one image, were a bit more time-consuming. All images
would have to be sized to fit into the space. I die cut the postage collage using
white card stock. Then I printed this sheet out and edited the size more than once,
every time printing it out onto copy paper. Then when they were all sized the
way I wanted, I printed them out onto white card stock.

As I was choosing my background paper, I came across paper that was
brightly colored and included a wood grain print. When I saw the brown I knew
I wanted the “BBQ” to be printed on that. So I taped a piece of the patterned
paper to a copy paper version of what I printed on card stock and ran it
through my printer.

I chose a red gingham patterned paper for the postage collage die to
sit on. I really wanted to incorporate bright colors and this red really
speaks to me of backyard BBQ’s.

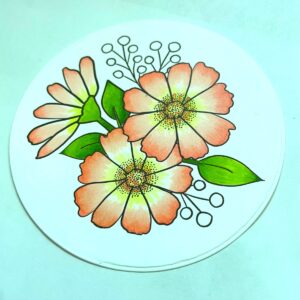
Once the letters were printed I used a few Copic markers to define them.

I then began the coloring. Although there is a fair bit of coloring on these
images, they are small so they really didn’t take that long. I started with
the burger and the hot dog. If you are wondering why I colored the hot dog
red, it’s because those are the ones my family loves. They snap when you bite
into them because of the red casing…so yummy!

The salad and corn-on-the-cob were next. I introduced blue to the mix of
colors by coloring the bowl with the BG family of colors. I knew I wanted to
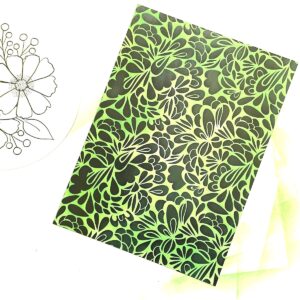
use Salvaged Patina Distress Ink for the stencil in each of the sections. The
BG family of colors matches this really well.

These were the last of the images to color. I added touches of red to match the
red gingham of the background paper.

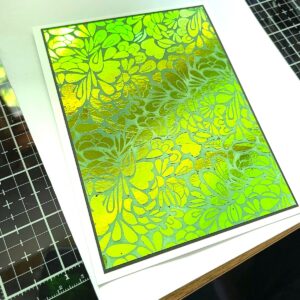
I stenciled each section about 2/3’s of the way up. I have to say in this photo
the Salvaged Patina Distress Ink looks really blotchy. But, as with all dye based
inks, this evened out and thankfully became a lot softer looking when it dried.
I fussy cut all the elements leaving a very narrow white border. I stamped “YOU’RE
INVITED” with a stamp from my stash. I adhered each of the elements in their
respective sections using foam tape. I used Glossy Accents on the butter on the corn, the
cheese on the burger, the barbeque grill, the mustard on the hot dog and the ice
in the glass of lemonade. I used Stickles on the lemon slice, the paper lanterns,
the tomatoes in the salad, and the seeds on the burger bun. I used a shimmer pen
on the BBQ letters, and the salad utensils. And that finished my invitation!

This little invitation was so much fun to make! You can find the
digital stamp set and many others at
Supplies used:
AlFresco Stamp Set
Postage collage die & Stencil
Salvaged Patina Distress Ink
White card stock card base or panel
Red gingham background paper
Foam tape
Invitation stamp
Woodgrain patterned paper
Shimmer pen
Stickles
Glossy Accents
Copic colors used: E23, E30, E37, E31, E33,
E34, R02, R05, Y15, YR12, Y02, E57, E74, E59,
YG11, YG06, YG09, Y06, Y21, BG10, BG53, BG000, Y00
Til next time…
Betsy
In my capacity as a design team member for Kate Hadfield Designs, I do receive the products I use from them.
All opinions and creative decisions remain my own, and I only work with companies/use products that I love.