Showing posts with label Stick & Stamp Mat. Show all posts

Tuesday, July 5, 2022

Coral Reef with Brutus Monroe


Hello everyone!  Summer is upon us and I'll be showing you today how to
make this underwater scene with products from


Have you used Candy Coat yet?  This exciting product brings dimension and
sparkle to your projects!  Let me show you how I made my card!
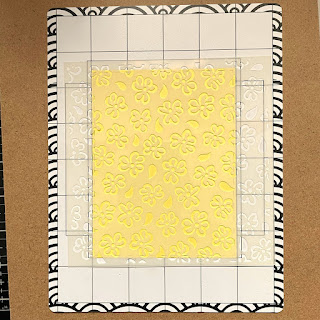
I decided to stencil on acetate!  I used the heat resistant acetate although
there was no heat involved.  It is a sturdier acetate so better suited to my card.
I placed my acetate onto my Stick & Stamp Mat and I taped down my
acetate.  I made the acetate sheet 5 1/2" 5 1/2" so it was quite big.


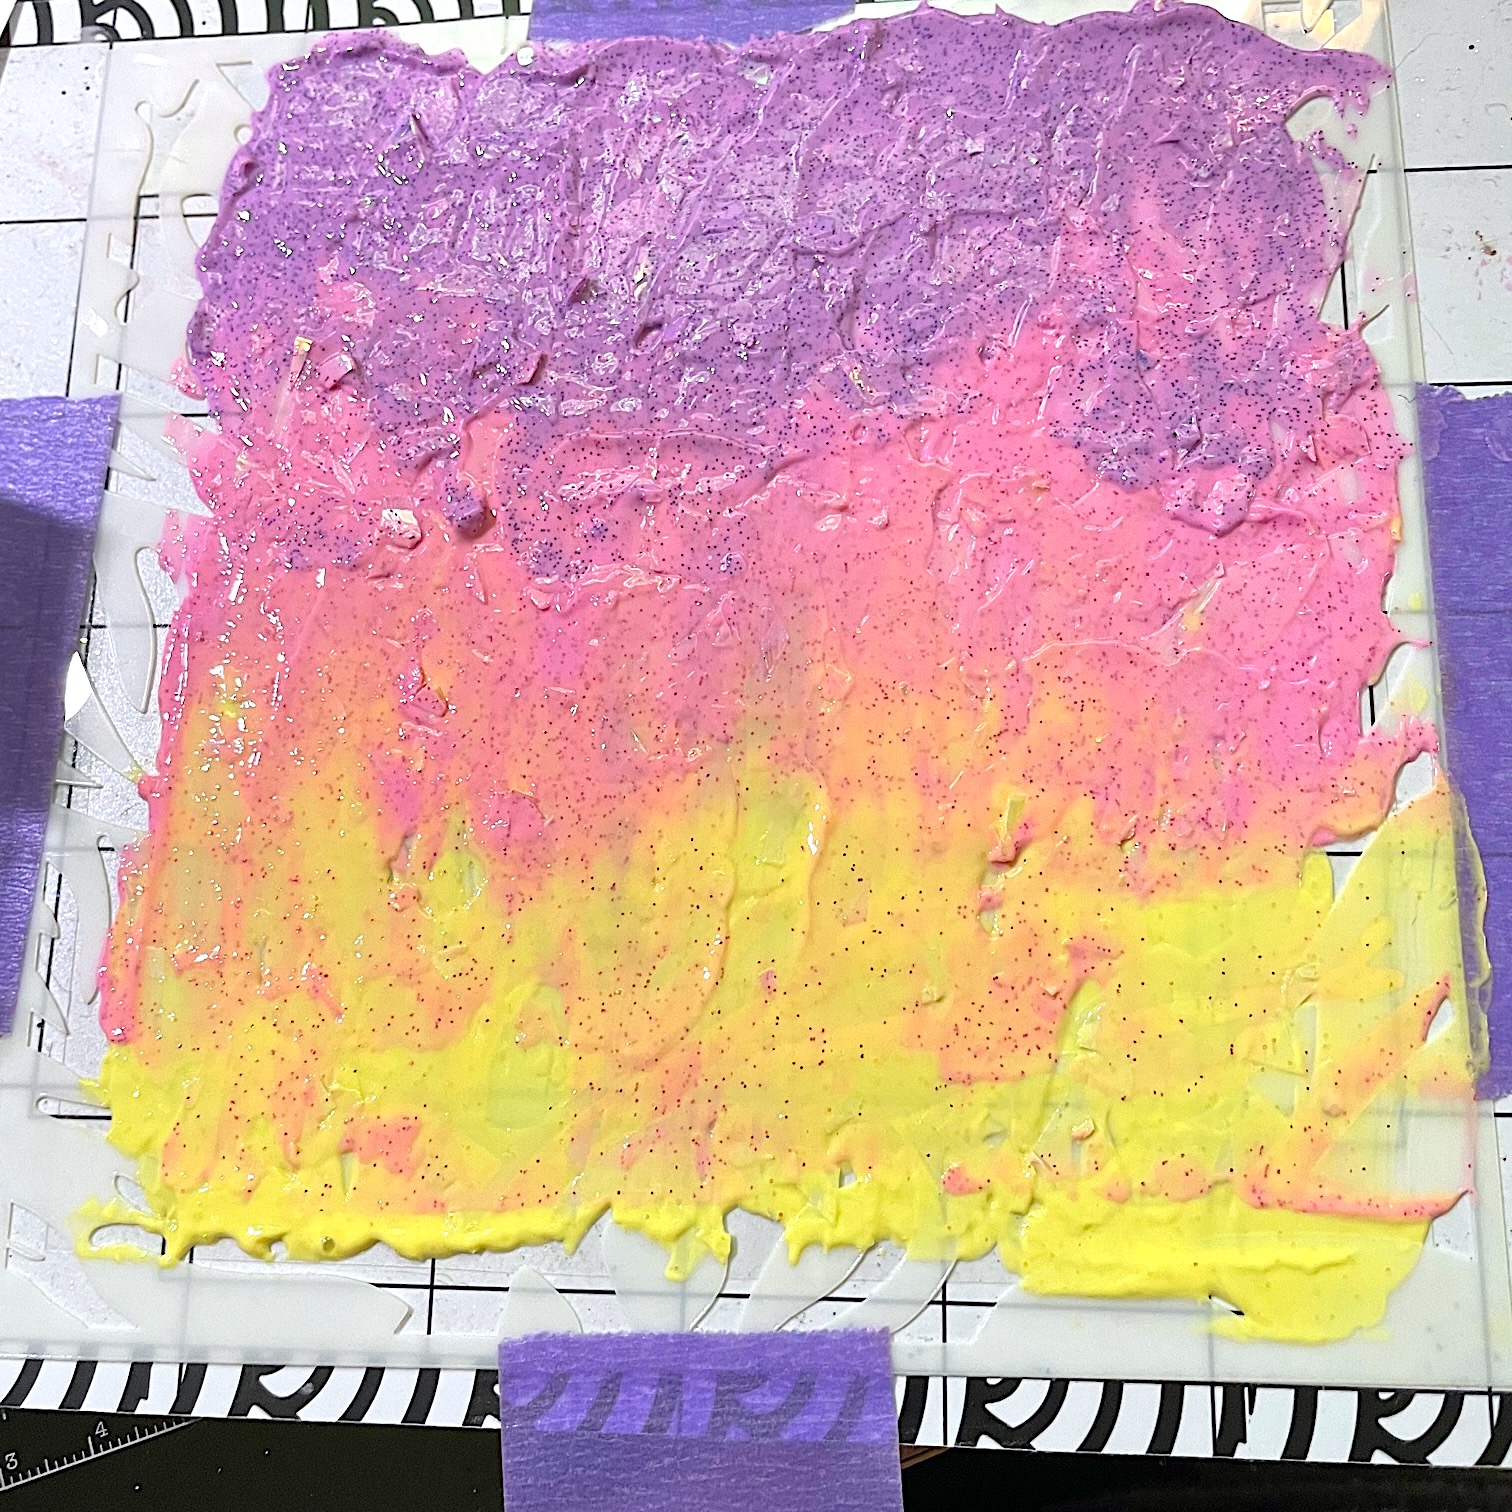
Although this definitely looks like a hot mess (LOL), I decided to
blended my Candy Coat colors on my project.  I used Yellow, Pink and
Purple Candy Coat.  I just slightly dragged one color into another.  I
let this dry over night after removing the stencil and washing it.  I
also lifted it up off my Stick & Stamp Mat and washed the mat down.


I was pleased with the blend when it was still wet.


I was even more pleased when it dried.  It reminds of the jelly shoes of
the 1980's!  I next prepared my paper to go underneath this panel.  I used
a piece of paper from the SeaLife Paper Collection.  I inked the edges.


I adhered some of my confetti pieces to this panel which measures
4" x 5 1/4".  I next stamped out my images to color.


The Copic colors I used were: YG23, YG06, YG67, YG63, W2,
W3, W5, W0 W1, Y02, Y17, YR04, BV02, BV13, Y06 and Y38.
I fussy cut these elements and then run a black marker around the
edges.  I stamped my sentiment with blue ink and die cut
it using the Circle Foundation Dies.  I ink blended around the
edges of this.


I prepared a white A2 top folding card base.  I covered that with some
Aqua card stock.  I adhered my inked paper panel to the base.  I
adhered my acetate panel to that hiding my glue underneath of where
the Candy Coat was.  I used foam tape to adhere my fish and sentiment.
I had a 1" wide piece of the acetate left, so I adhered that to the left
side of my card over one of the fish once again hiding my glue
underneath elements.  I used a shimmer pen on the fish and
the sentiment and that finished my card!


I hope you enjoyed today's project.  If you haven't given Candy Coat a try, what
are you waiting for?  Sparkly shiny fun!  Find it and the other products I
used at


Thanks so much for stopping by today. 

Betsy

In my capacity as a design team member for Brutus Monroe, I do receive the products I use from them. 

All opinions and creative decisions remain my own, and I only work with companies/use products that I love.


Tuesday, June 28, 2022

Painted Rainbow with Brutus Monroe


Hello everyone!  Today I'm continuing the rainbow theme with products from


This was so much fun to make - especially working with all that sparkly goodness
found in the Candy Coat!  Let me show you how I made my card.  I started my card using
a piece of 110lb white card stock that was cut to around 4" x 8".  I wanted plenty
of room to work with.  Using my Stick & Stamp Mat and the Painted Rainbow 
Stencil, I used Candy Coat as my medium.  I used Pink, Yellow, Green Teal
and Purple.  To make the orange I mixed Yellow and Pink and to make the blue,
I mixed Teal and Purple.


I let this dry overnight.  I had applied the Candy Coat quick thickly for good
coverage and bright color so it took a while to dry.  When it was dry I cut the
panel to 2 3/4" x 5 3/4".  I made a 3" x 6" mini slimline card base and 
adhered a piece of hot pink holographic paper to it just an 1/8" smaller. Using 
some heat resistant acetate I stamped my rainbow images and shooting
star and sentiment with black pigment ink.  Then I used Rainbow Sparkle
Embossing Powder to heat emboss.  Super easy to cut out and you really don't
see the edges in the finished project! 


 I backed my stenciled piece with 3
layers of the 110lb card stock.  I did this to give it dimension but to also
ensure that the stenciled piece didn't warp the entire front of my card.  It
made the card super stable.


With the rainbows and star from the Radiant Rainbow Stamp Set I was able to trim
out my images and then actually flip them over before adhering.  This made for a
crisper image, but you  can still see the sparkle from the embossing powder.  I
adhered these elements flat to the surface and my rainbow card was done!


I hope you enjoyed today's fun rainbow tutorial.  Everyone should have some sort
of rainbow collection in their stash and this stencil is awesome!  Find it and the
other products I've used at


Thank you so much for stopping by!  Have a great week!

Betsy

In my capacity as a design team member for Brutus Monroe, I do receive the products I use from them. 

All opinions and creative decisions remain my own, and I only work with companies/use products that I love.


Tuesday, May 17, 2022

Hawaiian Shirt with Brutus Monroe


Hello everyone!  Hope everyone's spring is warming up!  Today I am
sharing with you a fun summer project using products from


This was a fun card that allowed me to use a new tool from Brutus Monroe -
the Blending Buddy with my Stick & Stamp Mat.  The Blending Buddy
holds onto your stencils that allows you to use them with no extra low
tack adhesive.  So I cut a panel from Buttercream card stock and laid
out the panel and my stencil on my Stick & Stamp Mat.  I decided to do
a little rainbow stenciling with the Chroma Glaze.  Everything worked
really well and clean-up was a breeze!


I used Green, Yellow, Orange and Pink Chroma Glazes.  After it
was stenciled I immediately washed everything off.  When Chroma
Glaze first goes down it's very creamy.  But when this dries it packs
a powerful punch of color and remains plyable!


Once this was dry I cut it down to 4" x 5 1/4".  Using some warm colored
holographic card stock from my stash and the Slim Line Sentiment Die Set.
(these are currently on sale at an AWESOME price!)).This set does not have the word 
Aloha in it, but I was able to make the word from other words that are in the set.


I made a base for my card from more of the Buttercream Card Stock.  I
attached my stenciled panel to the base using a piece of double sided
adhesive foam.  I adhered my Aloha kind of wonky in the lower center
of the panel with liquid adhesive.  For embellishments, I added some tiny
clay fruit pieces in the centers of my flowers and my card was done!


This card project was a snap to make!  And it's so colorful and
summery!  Purchase the products I used at


Thanks so much for stopping by and letting me inspire you!

Betsy

In my capacity as a design team member for Brutus Monroe, I do receive the products I use from them. 

All opinions and creative decisions remain my own, and I only work with companies/use products that I love.


Tuesday, February 15, 2022

Blanket of Blooms with Brutus Monroe


Hello everyone!  Today I'm sharing a project with new products from


I also used the new Stick & Stamp Mat for my stenciling.  The Glitter
Glaze I'm using today is Fallen Snow.  This is definitely my favorite
Glitter Glaze because it's transparent.  That means when it dries there is
a lovely sparkly iridescent shimmer that is left that lays over any color
that's underneath it.
Let me show you how I made my card!  I started with a die cut panel
 of Buttercream Card Stock using a smaller rectangle die.
  

  I laid that on my Stick & Stamp Mat and then positioned the stencil 
over it making sure the sides were sticking down securely.


Using pink, yellow and green inks from Simon Hurley's line and a small blending brush,
I applied my ink to the stencil.  It didn't slip at all and stayed securely in place while I
was stenciling.  


With the stencil still in place I applied my Fallen Snow Glitter Glaze.


Right after the application of the Glitter Glaze I removed my stencil and washed
it.  I removed my panel from the Stick & Stamp mat by bending the mat to 
release the panel.  I set that aside to dry.  I took a scrap of pink card stock that
was a very good match to the pink on the panel.  Using a palette knife I 
applied Fallen Snow Glitter Glaze to this piece.


I let this dry and then die cut my sentiment from it using the
Christopher's Sentiments Die Set.  I die cut the shadow piece using
a piece of gold shimmer vellum.


I adhered the 2 together to form my sentiment.  I made an A2 size card
base from the Buttercream card stock and then but a green card stock
panel to 4 1/8" x 5 3/8".  I tied a pink silk ribbon around the left side
of the stenciled panel.


I adhered the green panel to the card base and then the stenciled panel
popped up on foam tape.  I adhered my sentiment down.  I took the
Fallen Snow Glitter Glaze and with a Q-tip went over the sentiment again
and I went along the edges of the bow.  I also took a toothpick and
made tiny dots between the flowers on the panel.  Once all that was
dry my card was finished!


I hope you enjoyed today's tutorial.  I love using new products and finding
new ways to use the products I have!  You can find what I have used at


Thanks so much for stopping by today!

Betsy

In my capacity as a design team member for Brutus Monroe, I do receive the products I use from them. 
All opinions and creative decisions remain my own, and I only work with companies/use products that I love